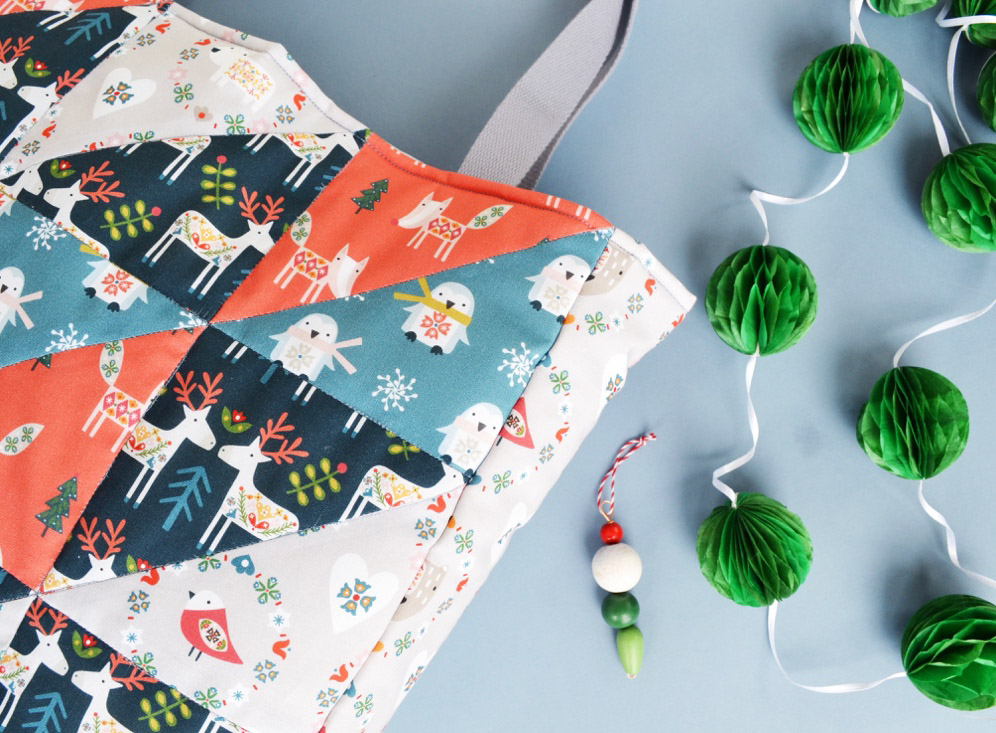
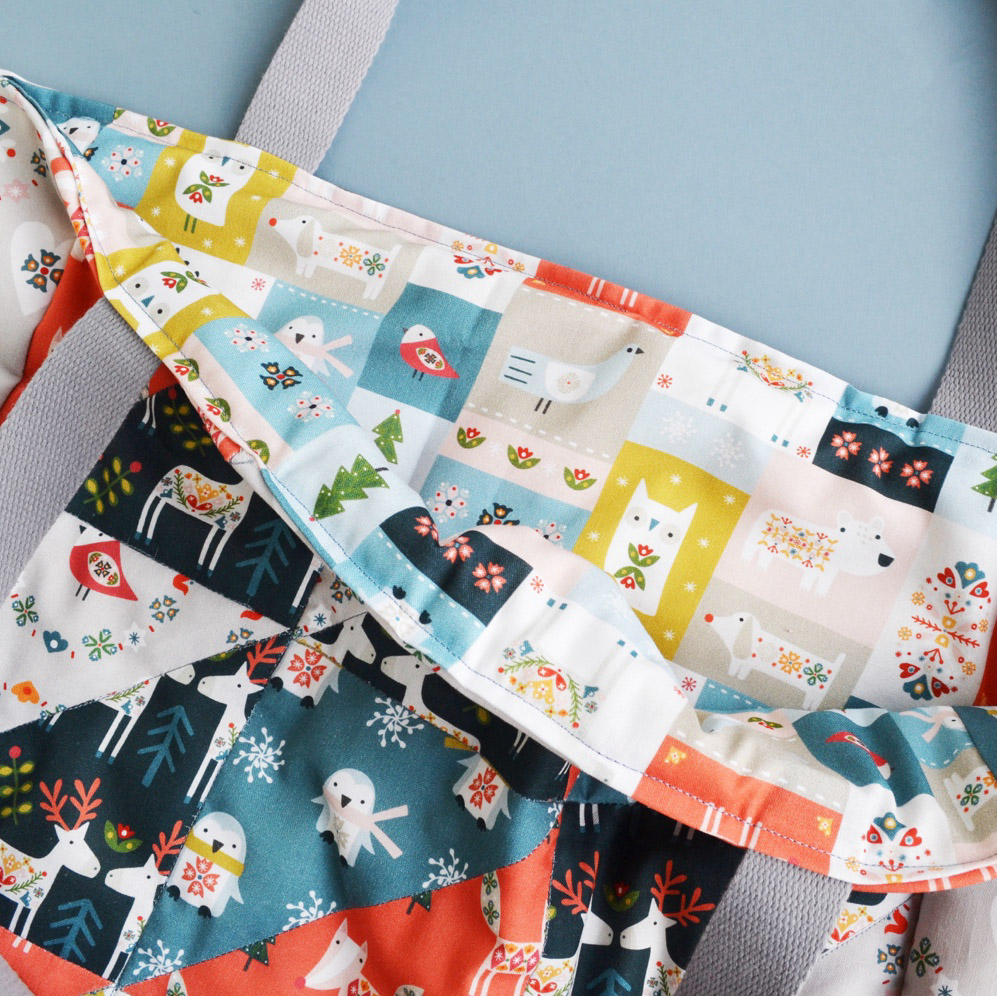
Winter Folk Patchwork Bag
Winter Folk by Sally Payne
Sewing Project by by Anna Alicia
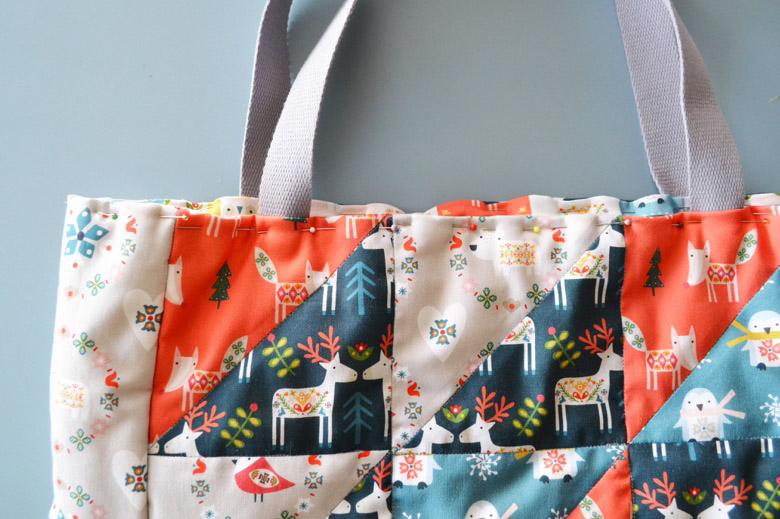
This quilted, oversized tote bag is super roomy and lightly padded – perfect for Christmas shopping, hauling gifts around or even as an overnight bag! I’ve used fabric from the Winter Folk collection by Sally Payne, with its subtly festive palette and cute Scandi-inspired animals!

What you’ll need
– 1/4m coral (2141) quilting weight fabric
– 1/2m grey (2142) quilting weight fabric
– 1/4m mid-blue (2143) quilting weight fabric
– 1/2m navy (2140) quilting weight fabric
– 1m multi (2139) quilting weight fabric
– 70cm x 100cm lightweight wadding
– 1.5m cotton webbing in grey, 3cm wide
– Standard sewing kit
Your bag will end up roughly 40cm high x 40cm wide and 13cm deep
Let’s get started!
1. Start by cutting out the following 15cm squares:
6 in Navy, 4 in Grey, 4 in Coral, 4 in Mid-blue
2. Also cut:
Navy, one piece 41cm x 41cm
Grey, two pieces 41cm (h) x 15cm (w)
Grey, one piece 15cm (h) x 41cm (w)
Multi, two pieces 41cm x 41cm
Multi, two pieces 41cm (h) x 15cm (w)
Multi, one piece 15cm (h) x 41cm (w)
Wadding, one piece 45cm x 45cm
Wadding, one piece 41cm x 41cm
Wadding, three pieces 15cm x 45cm
Set these pieces aside for now.
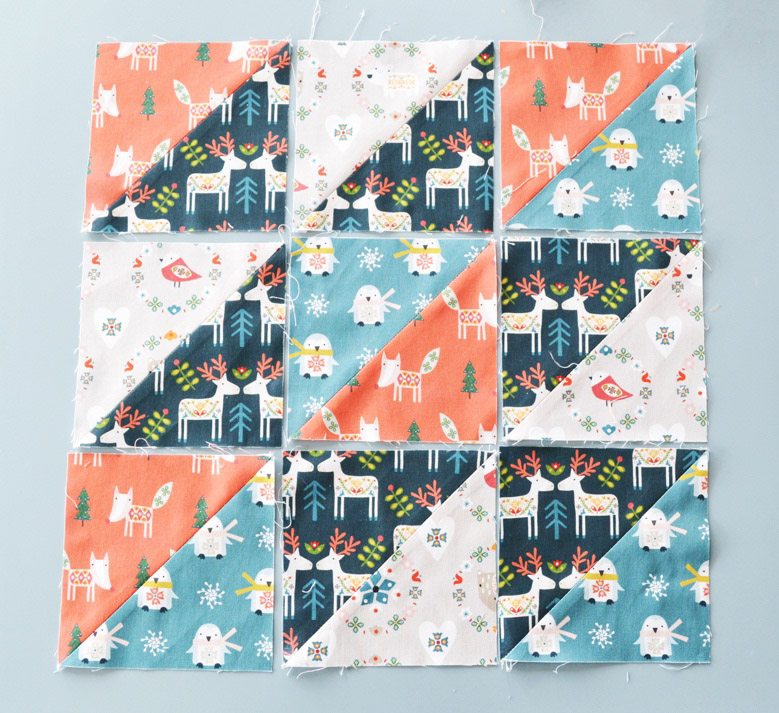
3. Now we’ll need to pair up the squares we cut in step 1 to make a set of nine squares, each formed of two triangles.
Lay out (face-up) three navy squares, three mid-blue squares, two grey squares, and one coral square (these will form the bottom triangle of each square).
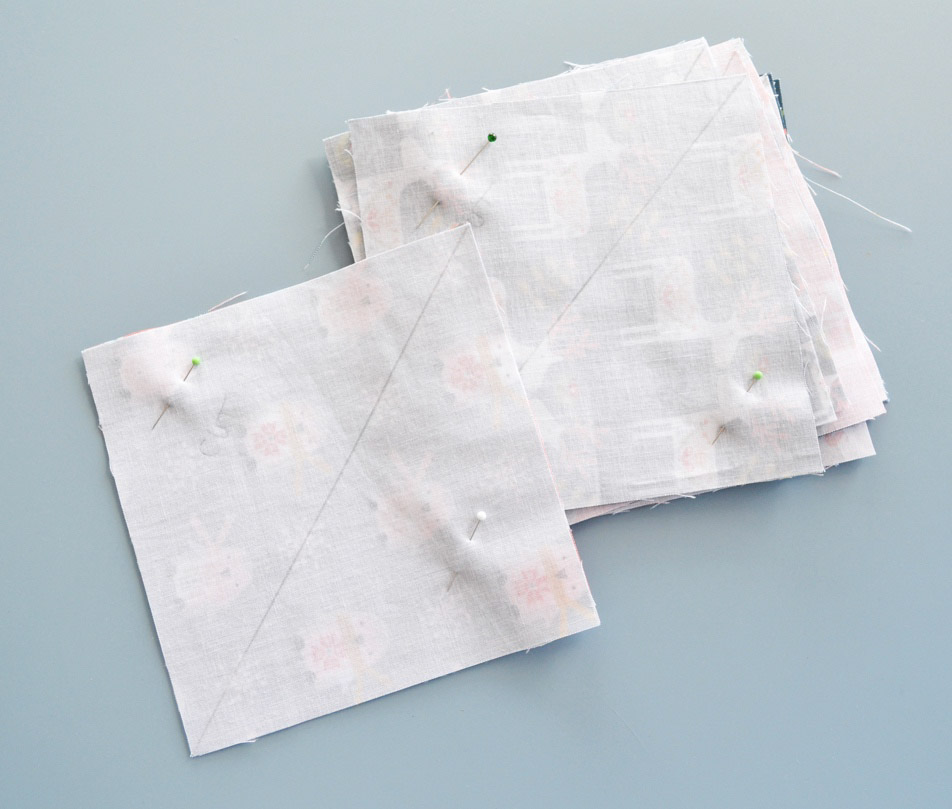
4. On top of one of your navy squares place a coral square, face-down.
Turn the coral square 90 degrees clockwise (this will mean the fabric’s pattern ends up right way up once you open out the triangles!).
Pin the squares together and draw a diagonal line from the bottom left to the
top right corner.
You might also find it helpful to mark the top left corner with an X or the word CUT, so you remember that’s the part you’ll want to cut away!
Repeat this step with grey squares on top of the remaining navy squares, two coral and one navy on top of the mid-blue squares, two navy on top of the grey squares and a mid-blue on top of the coral square.
5. Stitch along the lines you marked then cut away the top left triangle, leaving a 1cm seam allowance.
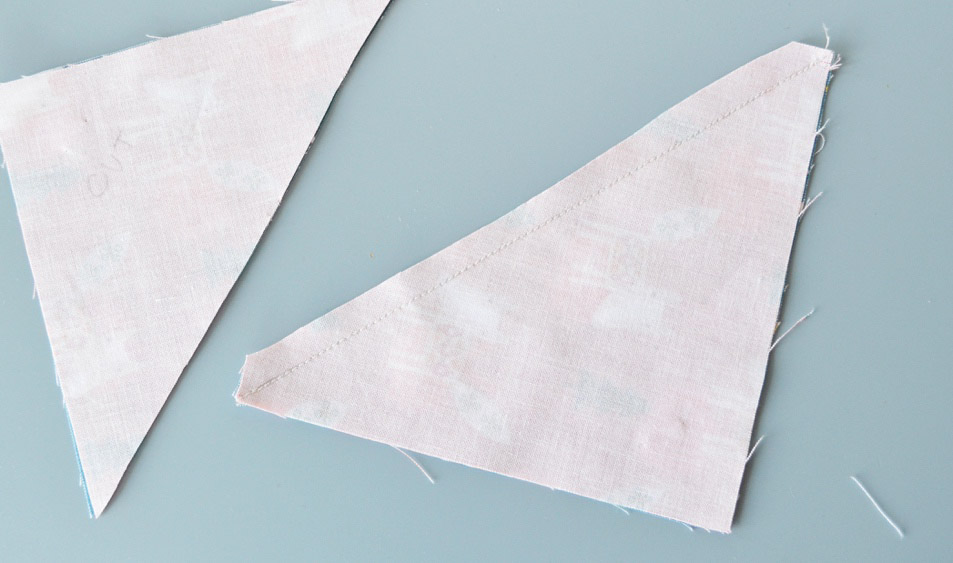
6. Open out each of your triangle pairs and press.
7. Lay out your squares in the pattern shown below.
8. Now we want to turn these into three strips, so turn your top squares over and place face-down on the squares below.
Pin along the top edge and sew with a 1cm seam allowance.
Open out and press.
Place your squares back in their original positions and now turn the bottom squares over and place on the squares above.
Pin along the bottom edge and sew with a 1cm seam allowance.
Open out and press, then lay out again in their original positions.

9. Turn the right-hand strip over and place on top of the middle strip. Pin and then sew along the right-hand edge with a 1cm seam allowance.
Open out and press.
Lay out again and turn the remaining left-hand strip over, placing on top of the centre strip.
Pin along the left-hand edge and sew with a 1cm seam
allowance.
Open out and press
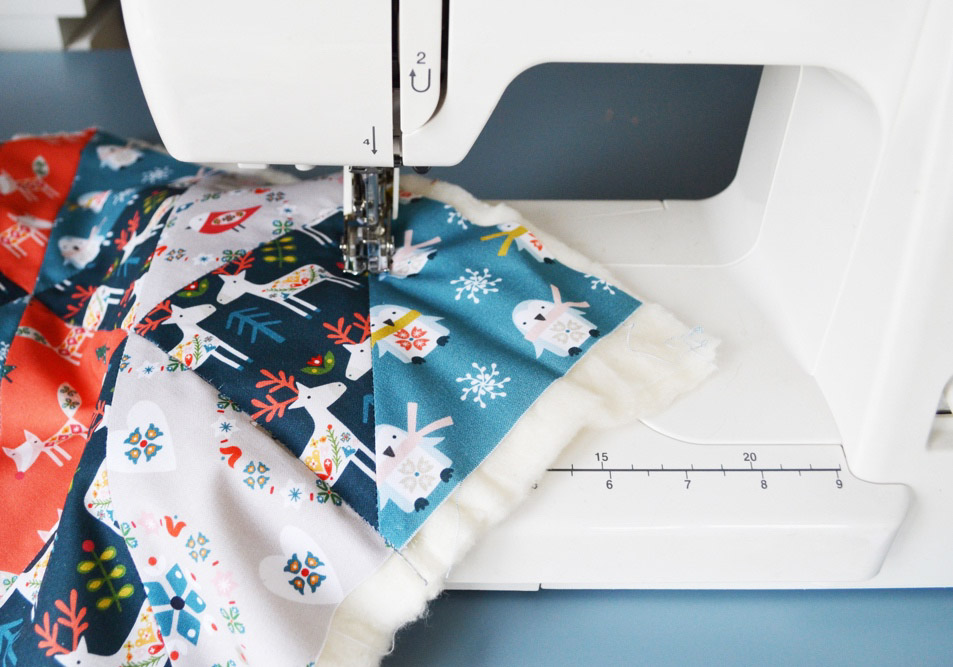
10. To finish the front panel all we need to do now is quilt it!
Lay out your slightly larger wadding square and place your panel face-up on
top. Add a few pins to hold in place.
Using a walking foot on your machine if you have one (an ordinary foot will do if not) sew along each of the vertical, horizontal, and diagonal seams.
11. Trim the excess wadding around your panel.
12. Now we can return to the pieces we cut in step 2 to assemble our bag!
Lay out your remaining wadding pieces and lay your navy square and grey strips on top, face-up.
Add a couple of pins to each to keep the layers together.
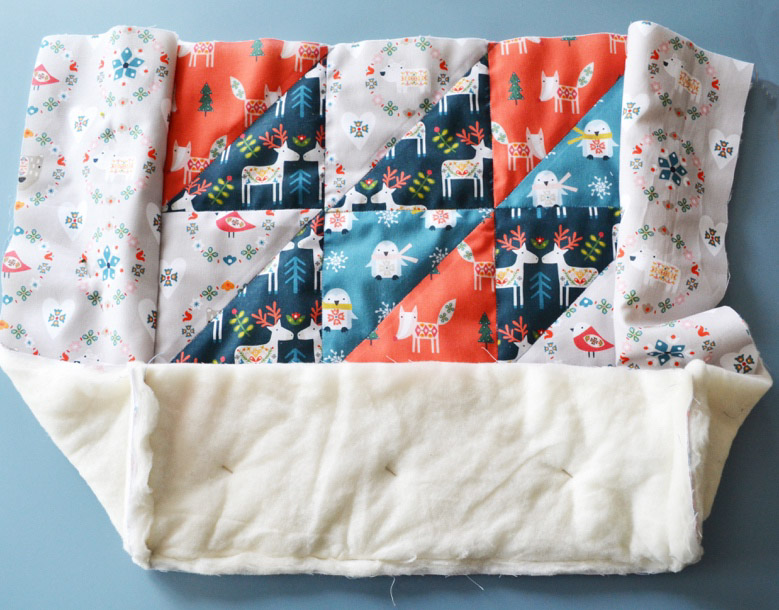
13. Lay out your quilted front panel and lay one of the 15cm wide grey strips face-down along the left-hand edge and one face-down along the right-hand edge.
(Note, one of your grey strips should be in the other orientation, so 15cm high and 41cm wide – save this one for the base!)
Pin along the outer right and left edges and sew with a 1cm seam allowance.

14. Open out the sides you’ve just attached and press.
Now take the remaining grey strip and lay face-down along the bottom edge.
Pin in place along that edge and also pin the bottom edge of each of the side strips along the sides of the base strip.
Sew along those edges with a 1cm seam allowance.
15. To finish the outer bag, take your navy square and pin, face-down, to the side and base strips (just the top edges should remain unpinned).
Sew along those edges with a 1cm seam allowance.
Remove any pins that were holding the wadding in place.
16. Repeat steps 13-15 with your lining pieces.

17. Fold the top edge of your lining out by 1cm all the way around and press.
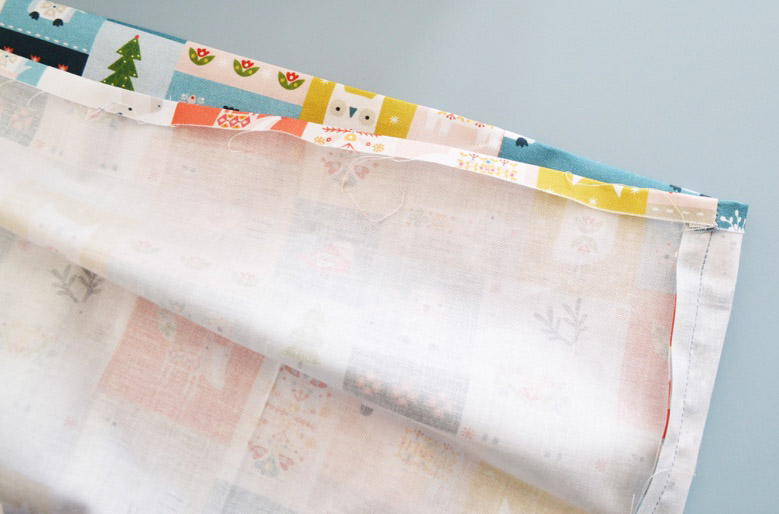
18. Turn your outer bag right way out and tuck the lining down inside the outer.
Fold the top edge of the outer in by 1cm all the way around and pin to the lining, so the top edges line up exactly.
19. Now we can add the straps!
Start by cutting two 60cm strips of your webbing.
20. On the front of your bag, measure and mark 5cm in from the left edge of the
front panel. Do the same at the right edge.
Tuck one end of one of your webbing strips 2cm down between the outer and lining (you’ll probably have to take out a pin or two to do this), so its outer edge lines up with one of the points you marked.
Pin in place.
Take the other end of your strap and do the same at the other point you marked.
Check that your webbing isn’t twisted before pinning in place.
21. Repeat step 20 with the other strap on the back panel of your bag.
22. Sew all the way around the top edge of your bag, roughly 3-4mm in.
You’re all done!