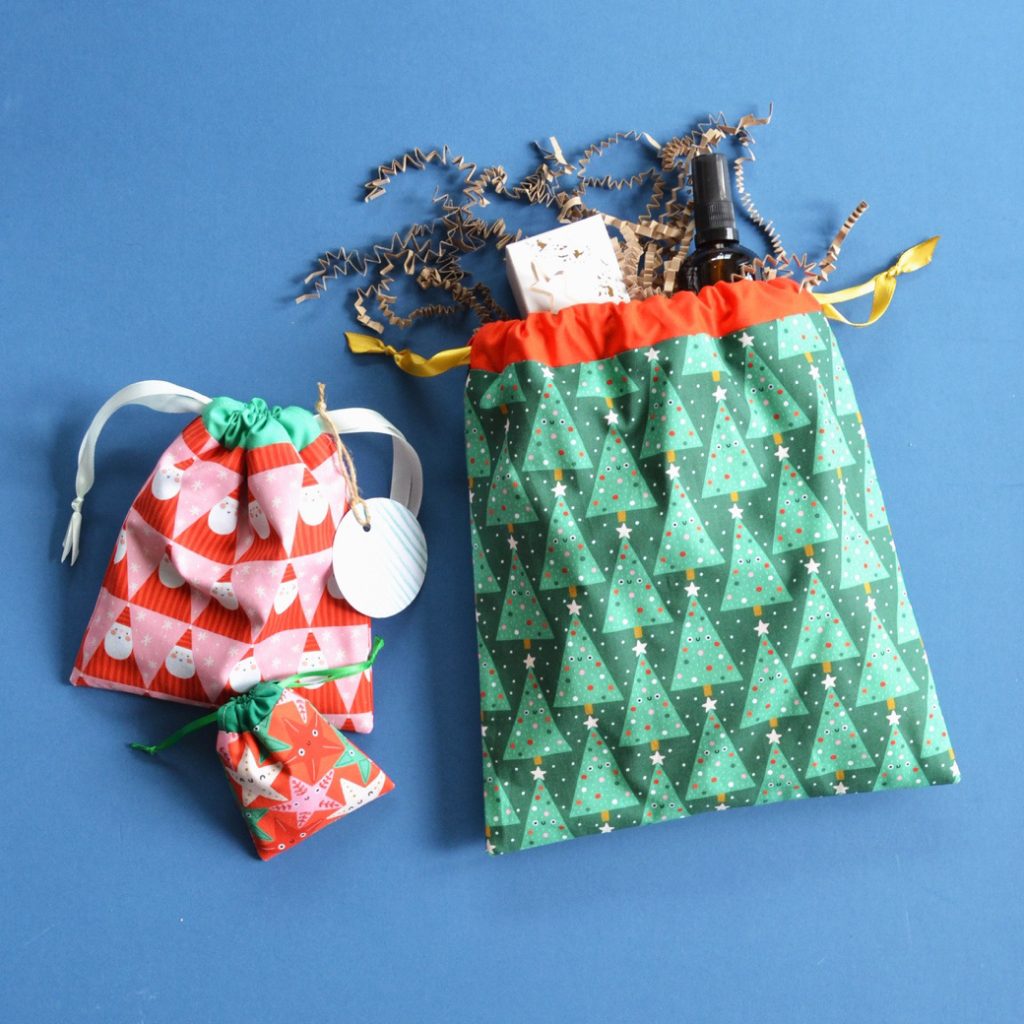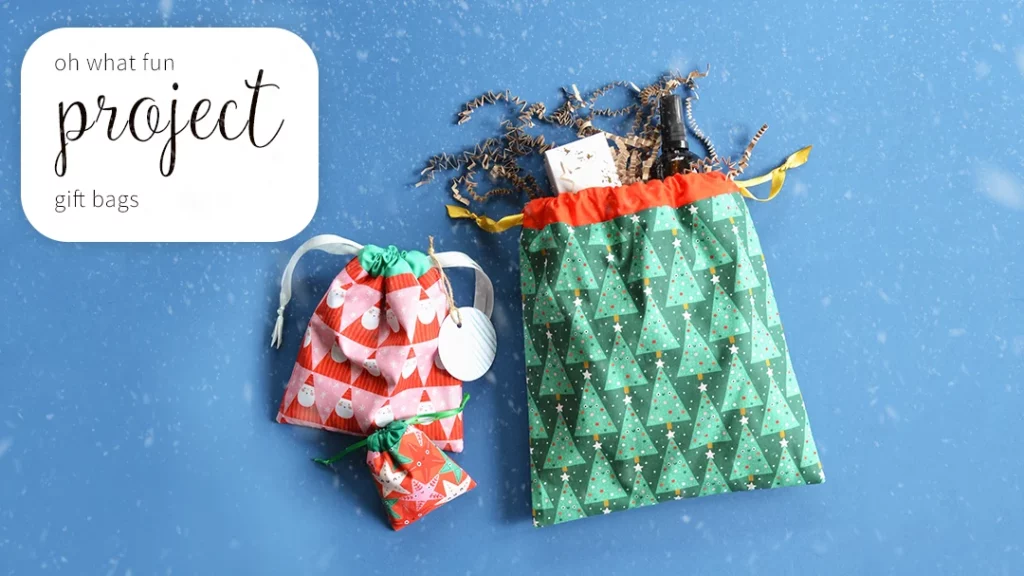
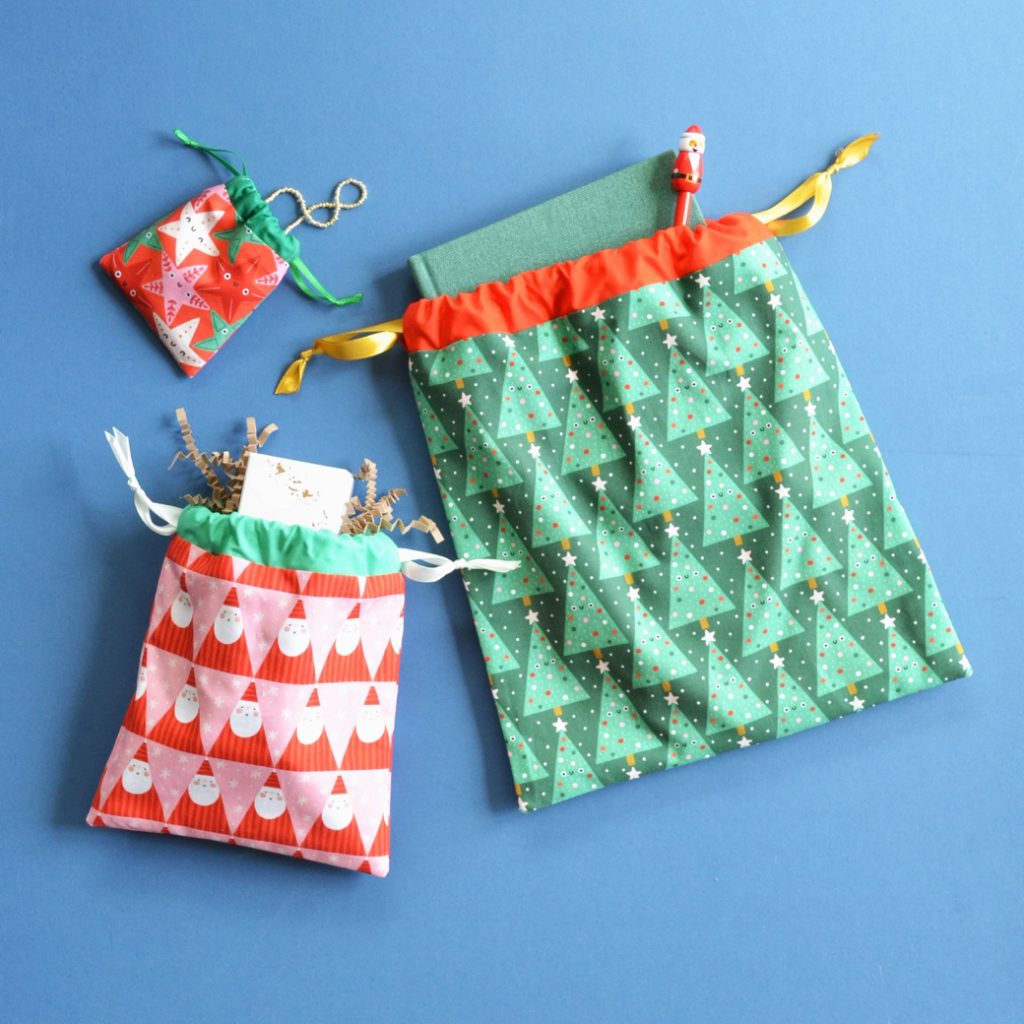
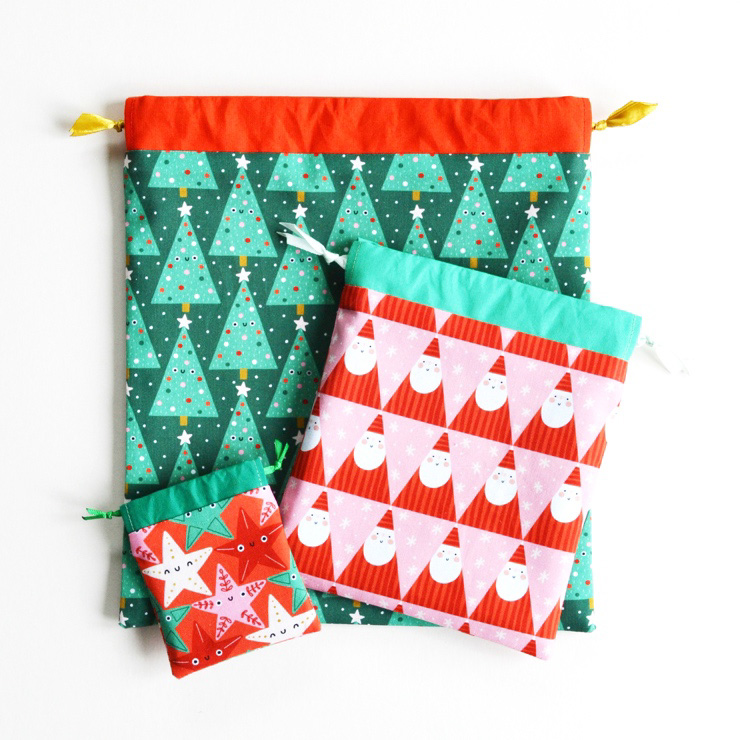
Oh What Fun Reusable Gift Bag Set
Oh What Fun by Jess Moorhouse
Sewing Project by by Anna Alicia
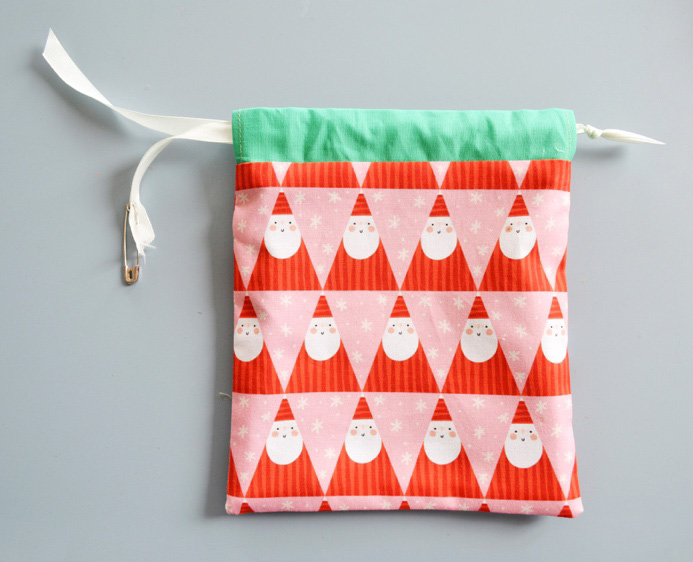
Adorable, reusable gift bags in three different sizes! The tiniest is ideal for jewellery, the middle bag works great for candles or small toys and the largest is perfect for a book or a box of chocolates! I’ve used fabric from the Oh What Fun collection by Jess Moorhouse, combined with coordinating Pop solids for a bright, festive feel!
What you’ll need
For the tiny size:
Your gift bag will end up roughly 9cm high x 8cm wide
– 15cm (h) x 25cm (w) patterned quilting weight fabric (Oh What Fun, 2209)
– 20cm (h) x 25cm (w) plain quilting weight fabric (Pop collection, Verde)
– 50cm satin ribbon, 3mm wide
For the medium size:
Your gift bag will end up roughly 18cm high x 15.5cm wide
– 20cm (h) x 40cm (w) patterned quilting weight fabric (Oh What Fun, 2206)
– 30cm (h) x 40cm (w) plain quilting weight fabric (Pop collection, Parrot)
– 1m satin ribbon, 10mm wide
For the large size:
Your gift bag will end up roughly 27cm high x 24.5cm wide
– 30cm (h) x 60cm (w) patterned quilting weight fabric (Oh What Fun, 2211)
– 40cm (h) x 60cm (w) plain quilting weight fabric (Pop collection, Chili)
– 1.5m satin ribbon, 10mm wide
– Standard sewing kit
– Candle or lighter for heat sealing the ribbons
Let’s get started!
1. Start by cutting out the pieces for whichever size bag you want to make first!
Tiny
Patterned outer fabric, two 10cm squares
Plain fabric, two 10cm squares
Plain fabric, two 10cm x 5cm strips
Medium
Patterned outer fabric, two 18cm squares
Plain fabric, two 18cm squares
Plain fabric, two 18cm x 7cm strips
Large
Patterned outer fabric, two 27cm squares
Plain fabric, two 27cm squares
Plain fabric, two 27cm x 8cm strips
The rest of the instructions will be the same for whichever size bag you are
making! The photos show the medium sized bag being sewn.
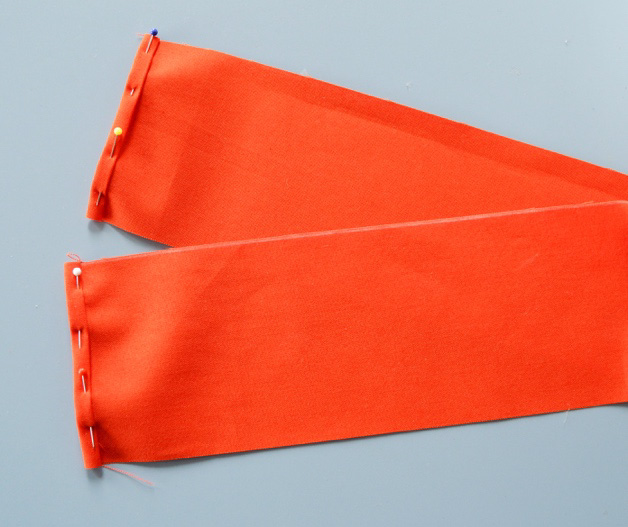
2. Lay out the two strips of plain fabric you cut (face-down if they have a right side) and fold both narrower edges of each in by 5mm, then 5mm again, pinning in place.
Sew along those edges.
This will form the neat ends of your drawstring channels!
Fold each strip in half (with the folded seams on the inside) so that the long edges meet.
Press to crease.
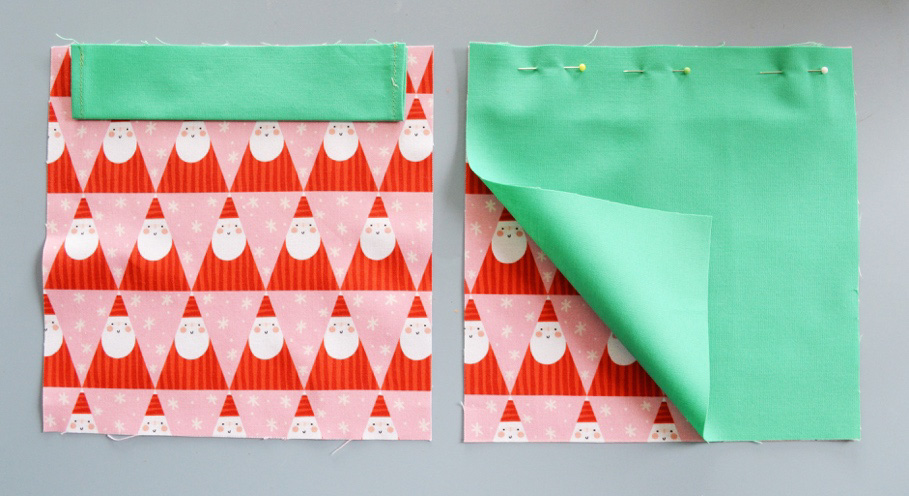
3. Lay out your two patterned squares, face-up.
Lay one of your folded strips along the top edge of each so that its raw, open edge lines up with the top edge of the square and it is equidistant from the left and right edges (there should be about 1cm left at each side).
Lay one of your plain squares on top of each (face-down if they have a right side).
Pin and then sew, with a 1cm seam allowance, along the top edge
where the folded strip is sandwiched.
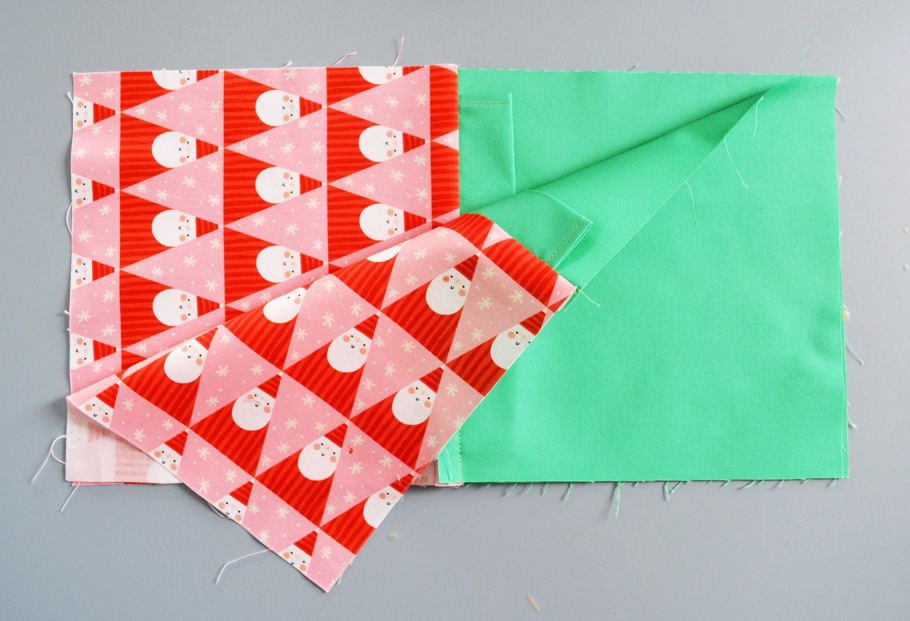
4. Open out and press your panels so that the drawstring channels overlap the plain side.
Lay out one of your panels face-up and lay the other on top, face-down, so that the patterned sides are face-to-face.
Pin around all the edges and sew with a 1cm seam allowance, leaving a roughly 5-6cm gap on the bottom edge of the lining.
When sewing, be careful not to sew over the edges of your drawstring channels!
5. Trim across the corners of your seam allowance.
Turn your bag right way out through the gap you left.
Give it a press and then sew up the gap (this will be hidden inside, so you can use your sewing machine)
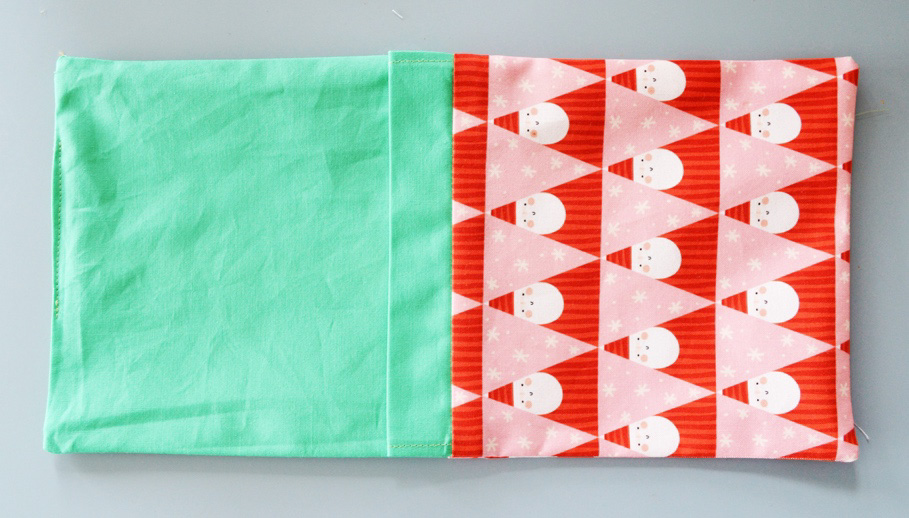
6. Tuck the plain lining down into the patterned outer.
7. Now all we need to do is add the drawstring ribbons! Cut your length of ribbon in half.
Pin a safety pin to one end of one piece of ribbon and use this to help you thread the ribbon through one of the channels, then back through the other channel. Tie the ends of the ribbon in a knot, close to the edge of your bag.
Repeat with the other ribbon, but in the opposite direction, so you end up
with a knot at each side of your bag.
8. Trim the excess ribbon away at a diagonal angle and, to prevent fraying, heat seal the ends of your ribbons using a candle flame or lighter (if you’ve not done this before, look up a demonstration of how to do this safely on YouTube).
Fill your bags with beautiful gifts and pull both knots away from one another to close!