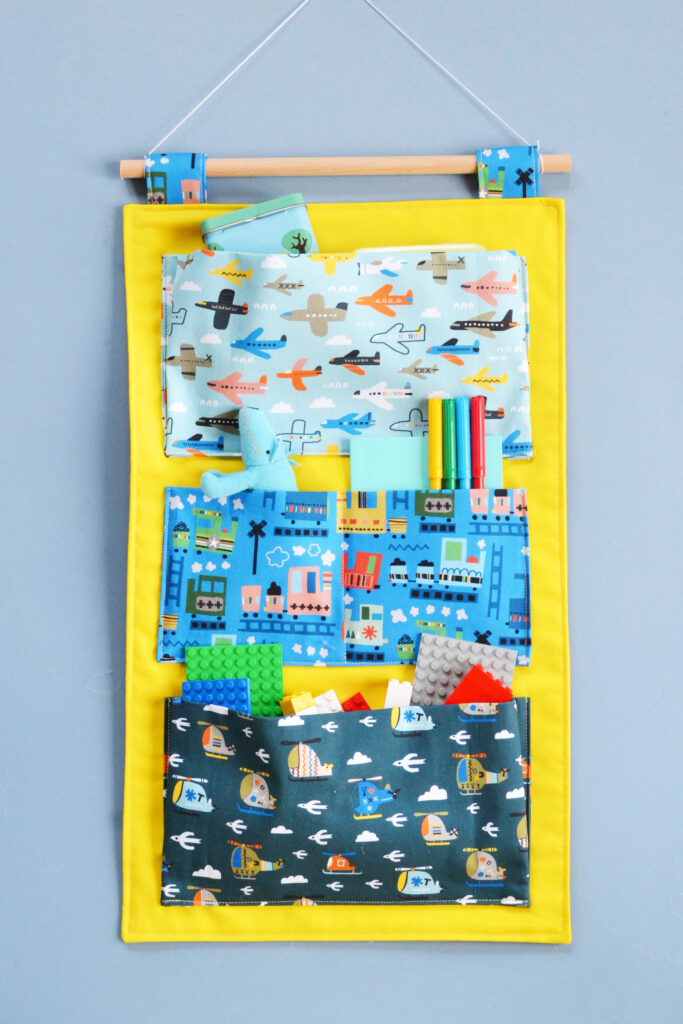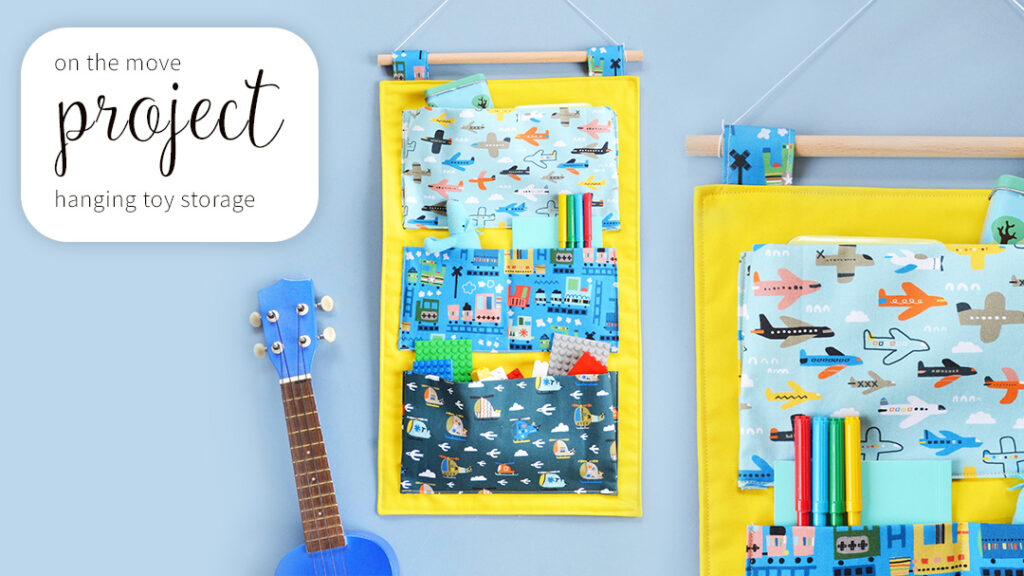
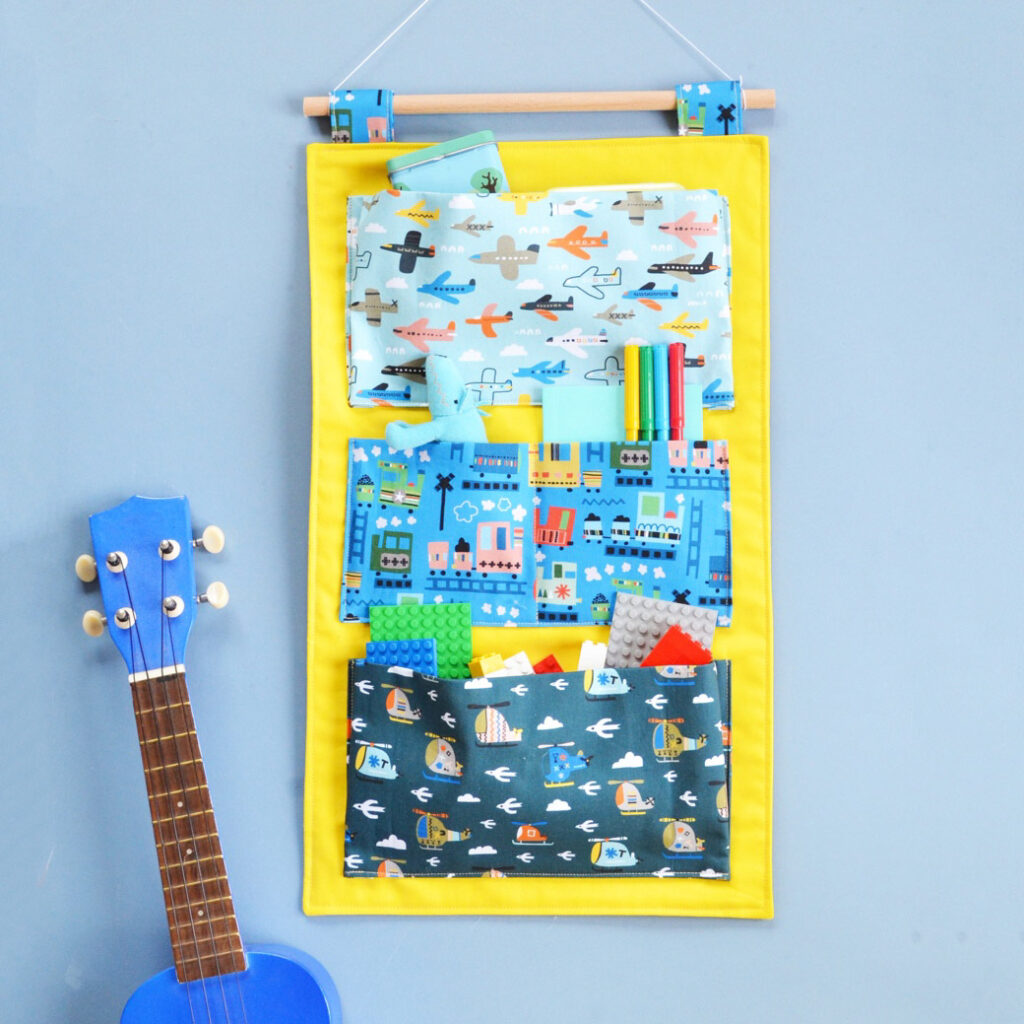
On The Move Hanging Toy Storage
On The Move by Stephanie Thannhauser
Sewing Project by Anna Alicia
The perfect way to add a little extra storage (along with a pop of colour!) above a desk or on a bedroom wall! Made with Stephanie Thannhauser’s On the Move collection, to keep any transport-fascinated child happy!
What you’ll need
– 1/2m plain yellow quilting weight fabric (Sunshine, Pop collection) for back panel
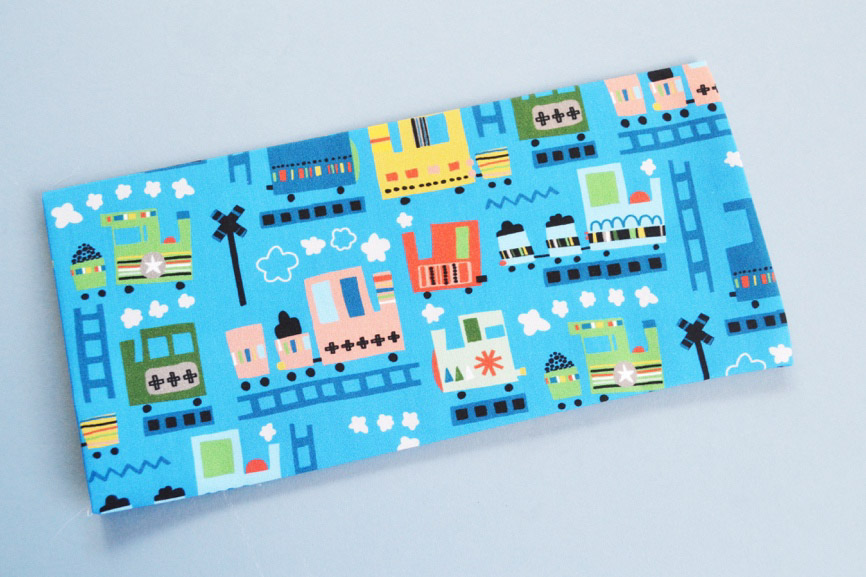
– 1/4m (as a fat quarter) quilting weight fabric for tabs and middle pocket (Move 2174)
– 1/4m (as a fat quarter) quilting weight fabric for top pocket (Move 2176)
– 1/4m (as a fat quarter) quilting weight fabric for bottom pocket (Move 2173)
– 1/2m calico or similar heavy-weight fabric, for back panel
– 60cm2 lightweight, single sided, fusible interfacing, for pockets
– 30cm wooden dowel, approximately 12mm diameter
– 50cm string or non-stretchy yarn to hang
– Standard sewing kit
Your hanging storage will end up roughly 54cm (h) x 30cm (w)
Let’s get started!
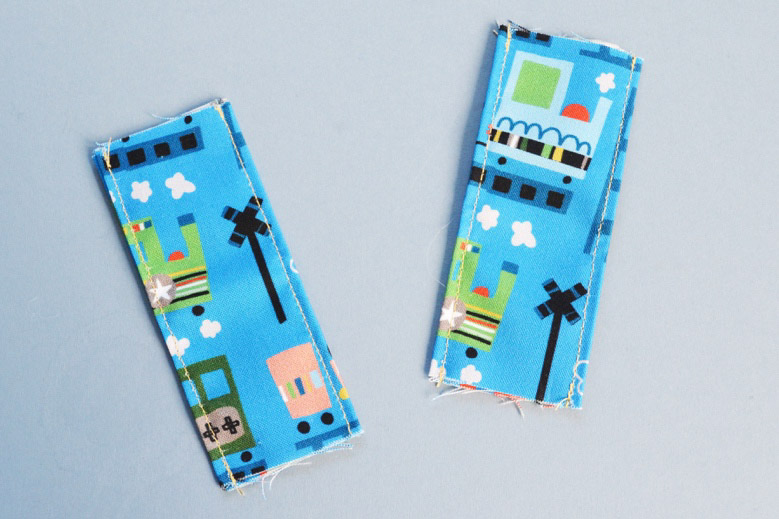
1. Let’s start by making the little tabs that your dowel will go through.
Cut two 10cm (h) x 16cm (w) strips of fabric from the fabric you’ll also use for your middle pocket.
Fold each strip in half, right-side out, so that the shorter edges meet, and press to crease.
Unfold, then fold again so that the edges meet at the centre crease (still right-side out). Finally, fold again along the centre crease.
Sew along both long edges of each strip roughly 2mm in.
2. Now we can prepare our back panel.
Cut two pieces of your yellow fabric, each 52cm (h) x 32cm (w). Also cut a piece of calico the same dimensions.
Lay out the calico then lay the two rectangles of yellow fabric on top (if your fabric has a right side, make sure the bottom yellow piece is face-up and the top one is face-down).
Pin along both long edges and one short edge. Sew along those edges, with a 1cm seam allowance, leaving one of the shorter edges open.
Trim across the corners of the seam allowance then turn your fabric right way
out, making sure you end up with the calico on the inside, sandwiched between the yellow pieces.
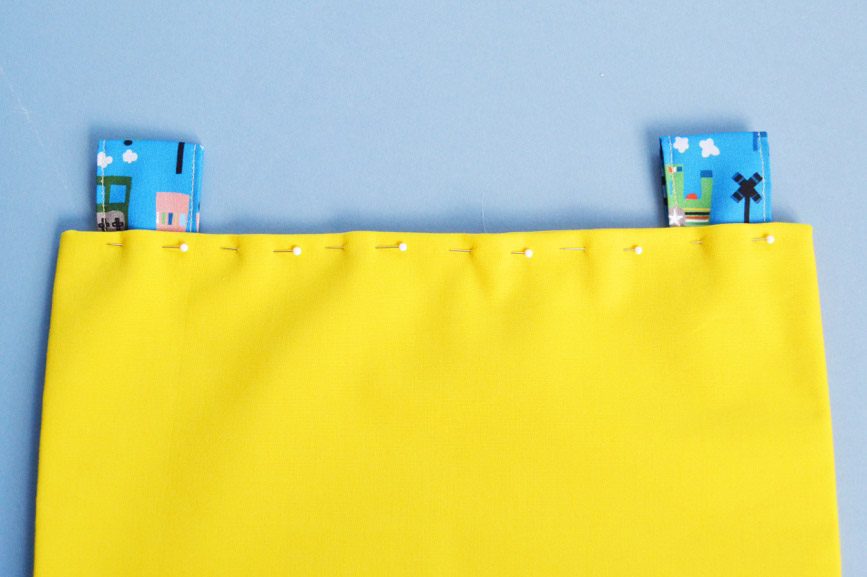
Give it a good press. Turn the top, open, edge in by 1cm and press.
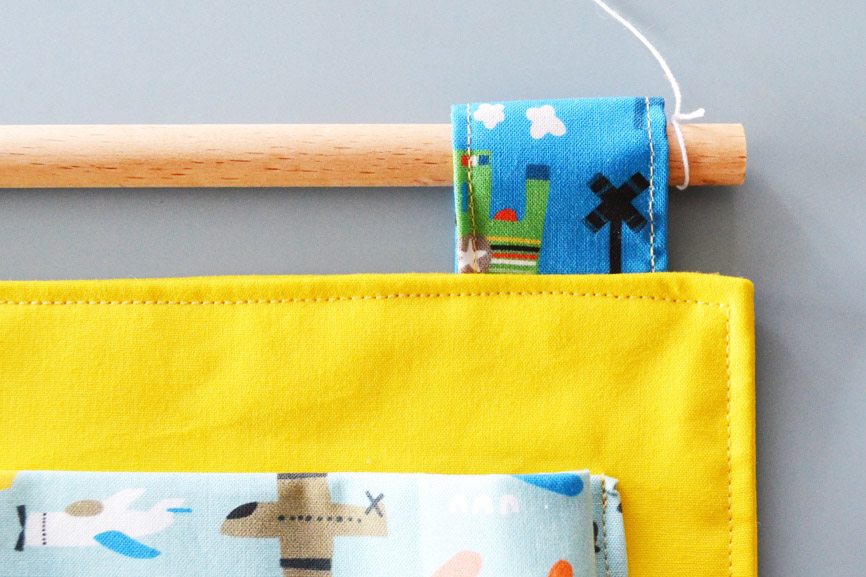
3. Fold one of the tab pieces that you made in step 1 in half, so the raw edges meet. Tuck those raw edges 1cm inside the top edge of your backing panel, 1.5cm in from the left-hand corner and pin in place.
Do the same with the other tab at the right-hand corner. Pin all the way along that top edge.
Sew all the way around the edge of your back panel, roughly 4mm in (this will sew your tabs in place as you go).
4. Now we can make the pockets!
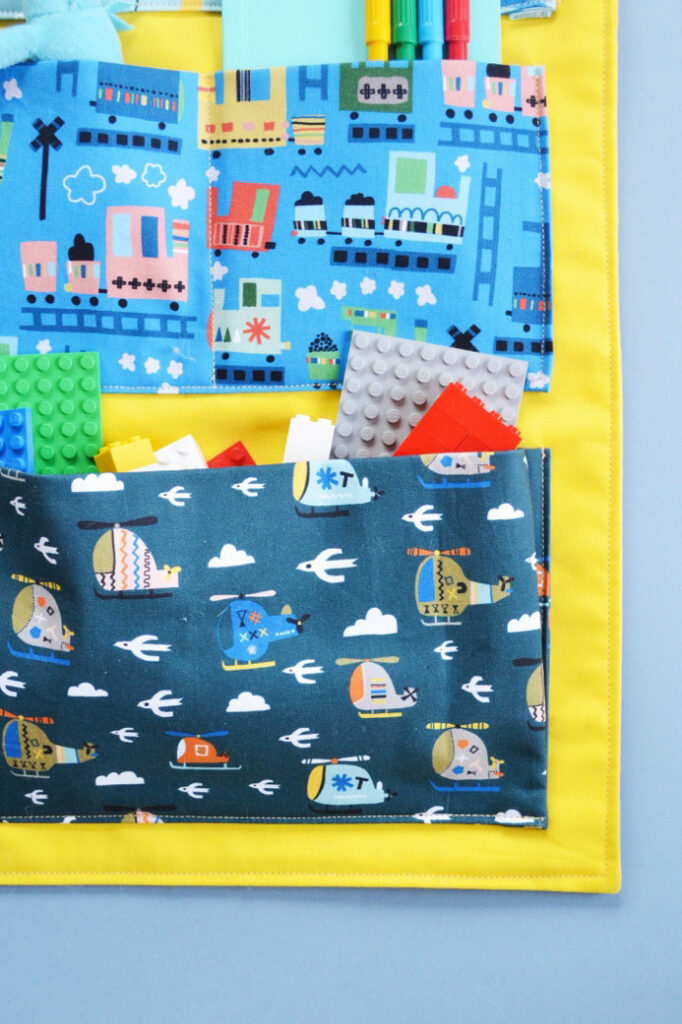
From your middle pocket fabric cut a rectangle 26cm (h) x 27cm (w).
From both your top and bottom pocket fabrics, cut a rectangle 30cm (h) x 33cm (w) Cut a matching piece of lightweight interfacing for each of the pocket pieces.
Lay out one of interfacing pieces, shiny side up, and lay the coordinating fabric piece in top, face-up.
Press to fuse, as per the instructions for your particular interfacing.
Repeat for the remaining pocket and interfacing pieces.
5. Take one of your pocket pieces and fold, right-side in so the longer edges meet.
Pin along that edge and sew with a 1cm seam allowance.
Turn right way out and press. Fold in both open ends by 1cm and press.
Repeat this step for each of your pocket pieces.
6.Now we can attach the pockets to the back panel.
Lay out the back panel, with the tabs at the top.
Place your top pocket 3.5cm down from the top edge of the yellow panel (the pocket will overhang the sides slightly, make sure it overhangs by the same amount on both sides). Pin in place.
Place and pin the bottom pocket in the same way, 2.5cm up from the bottom edge.
Place your middle pocket equidistant between the top and bottom pockets, making sure it is also equidistant between the left and right edges. Pin in place.
(Your panel should now look like the left image below)
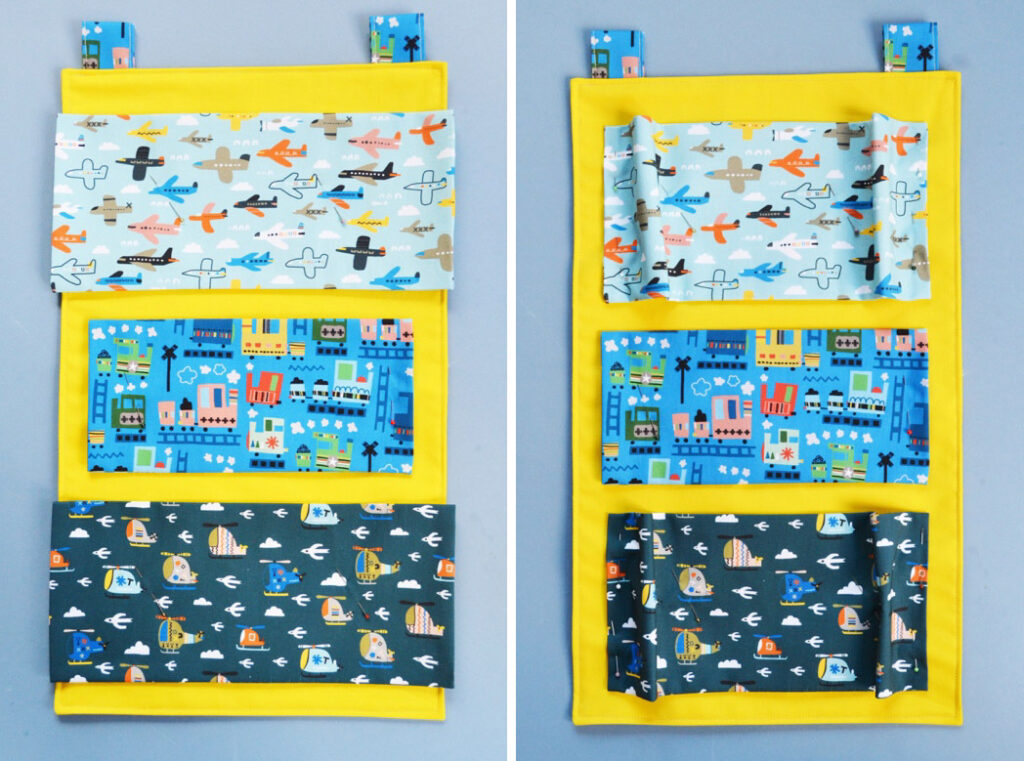
7.Before we sew the pockets in place, we need to get the sides of the top and bottom pockets in the right position (as shown in the right image above).
Bring the right-hand edge of the top pocket in so that it lines up with the right-hand-edge of the middle pocket (roughly 2.5cm in from the edge of the backing panel). Pin that edge in place.
Repeat with the left-hand edge of the top panel (lining it up with the lefthand edge of the middle pocket) and both side edges of the bottom pocket.
8. Sew along those side edges of the top and bottom pockets only, roughly 2- 3mm in.
For the middle pocket, sew along the side and bottom edges (2-3mm in), and also sew top to bottom at the centre, to divide the pocket into two pockets!
9. Now we can add the concertina folds to the side edges of the top and bottom pockets.
Fold one edge of one of the pockets in by roughly 1.5cm in a concertina fold (so the fold should go in-out-in). Pin in place.
Repeat this for both sides of the top and bottom pockets.
To hold the folds in place, sew along the bottom edge of both pockets.

10. Now we can slide the dowel through the tabs at the top and tie our string to either end of the dowel.
Your hanging storage is ready to hang up and fill up!