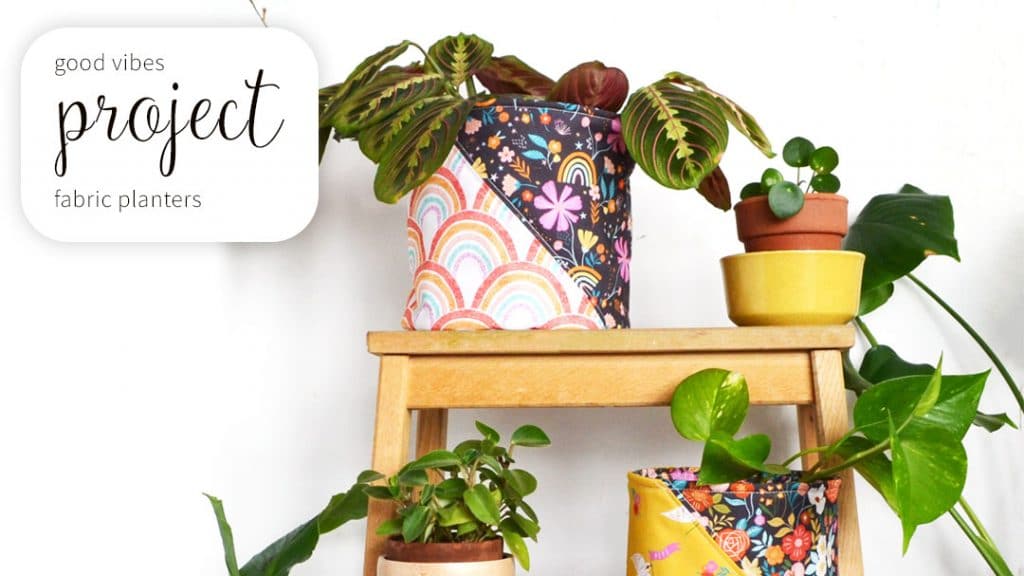
Learn to sew a bold but simple Fabric Planter!
Sewing Project by Anna Alicia
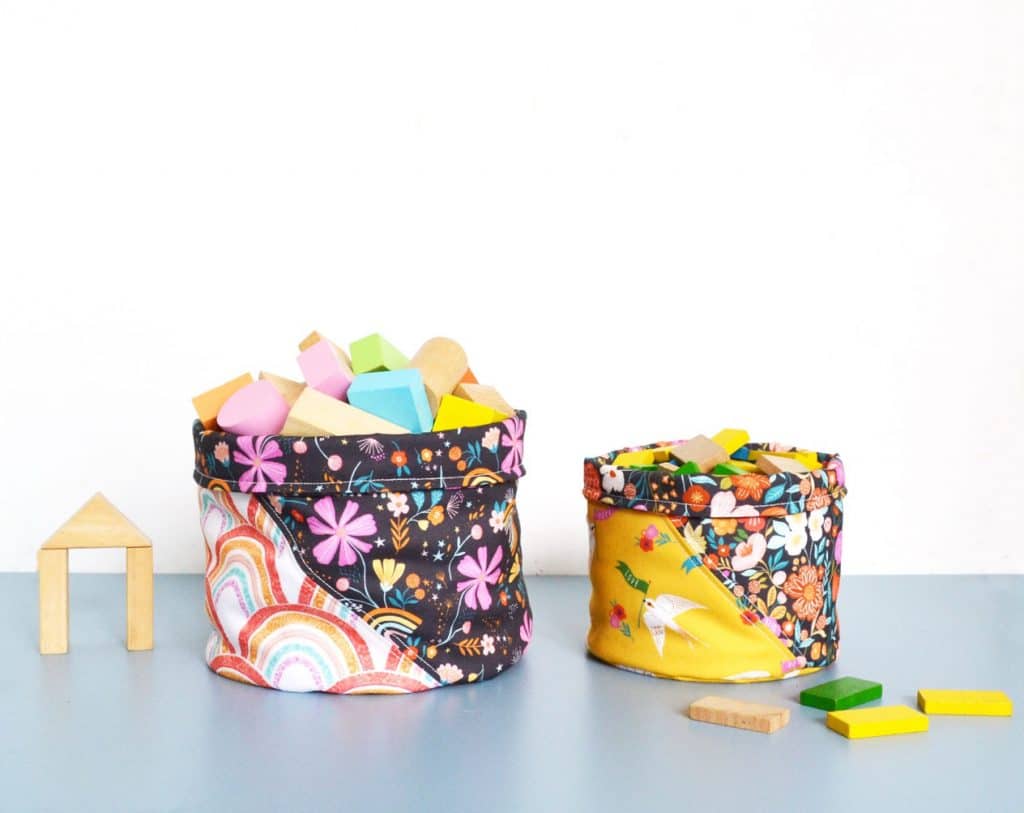
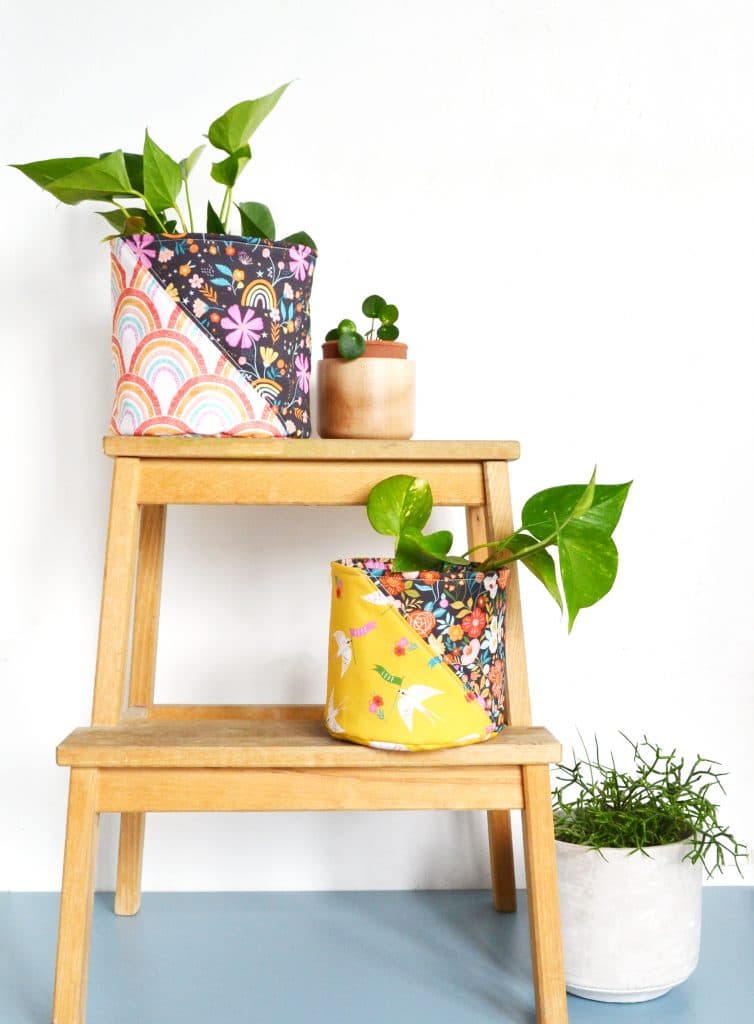
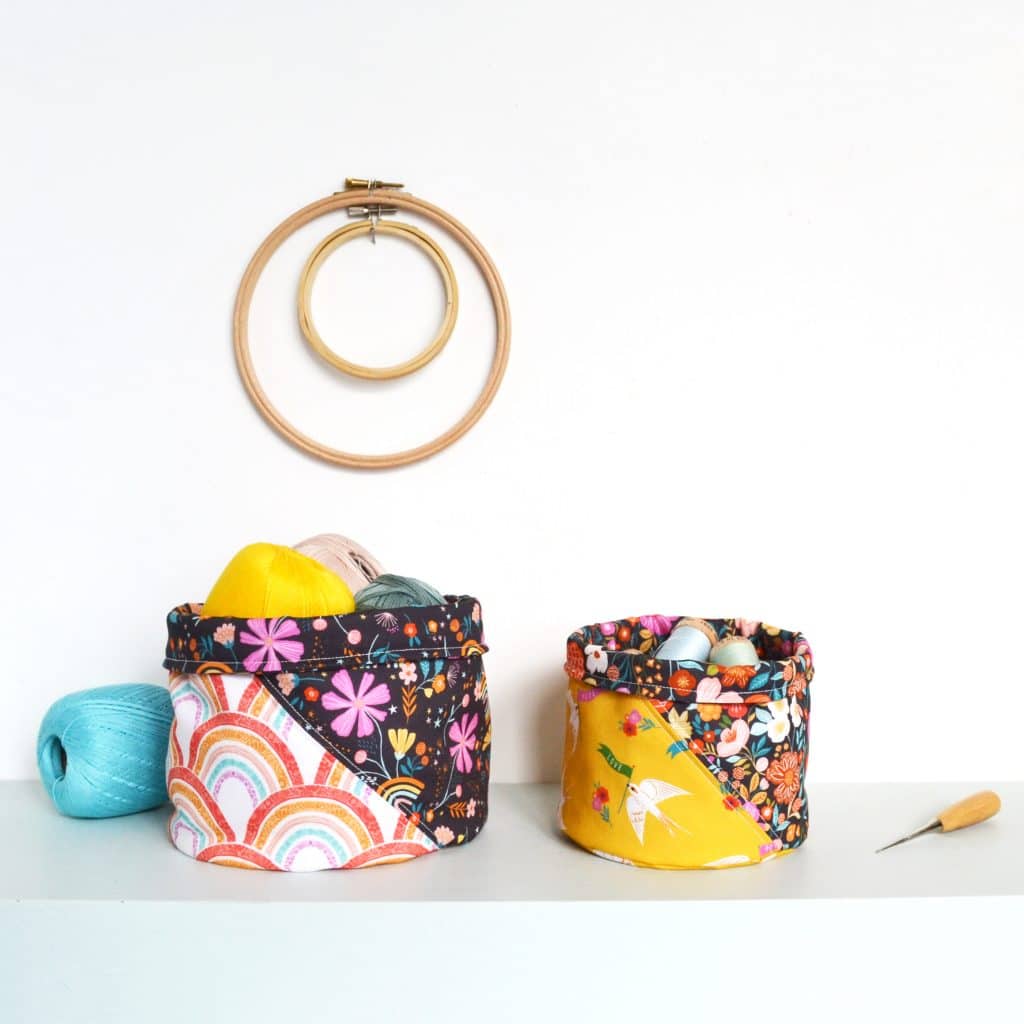
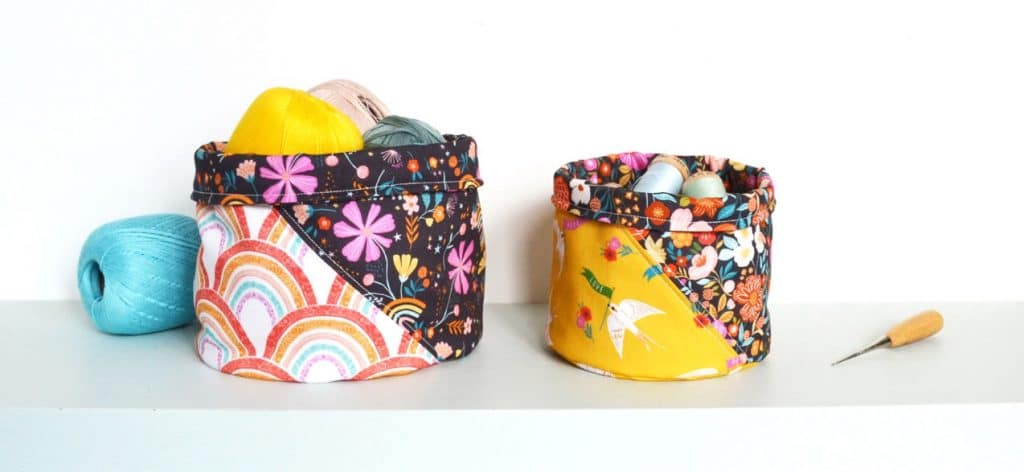
Brighten up your plant display with these bold but simple planters! They also double up as great storage baskets, perfect for keeping your workspace tidy.
I’ve combined fabrics from Dashwood Studio’s Good Vibes collection to give a contrast of brighter and darker fabrics, but with an over-all coherence.
Finished planters approximately:
Large, 17.5cm (h) x 18cm (w)
Small 14cm (h) x 15cm (w)
What you’ll need
For the large fabric planter:
- 25cm (h) x 65cm (w) bright fabric
- 50cm (h) x 100cm (w) darker fabric
- 25cm (h) x 85cm (w) light-weight wadding
For the small fabric planter:
- 20cm (h) x 50cm (w) bright fabric
- 35cm (h) x 85cm (w) darker fabric
- 20cm (h) x 75cm (w) light-weight wadding
For both:
- Thread (I chose to use white as I wanted the contrast stitching to show)
- Basic sewing kit
- OPTIONAL: Circle rotary cutter
- OPTIONAL: Quilting foot
Let’s get started!
1.
First, we need to cut out our fabric for the outer panels (we’ll cut the rest of the pieces out a bit later).
Large:
1 rectangle of your bright fabric, 20cm (h) x 39.5cm (w)
1 rectangle of your bright fabric, 20cm (h) x 39.5cm (w)Small:
1 rectangle of your bright fabric, 16cm (h) x 32cm (w)
1 rectangle of your bright fabric, 16cm (h) x 32cm (w)
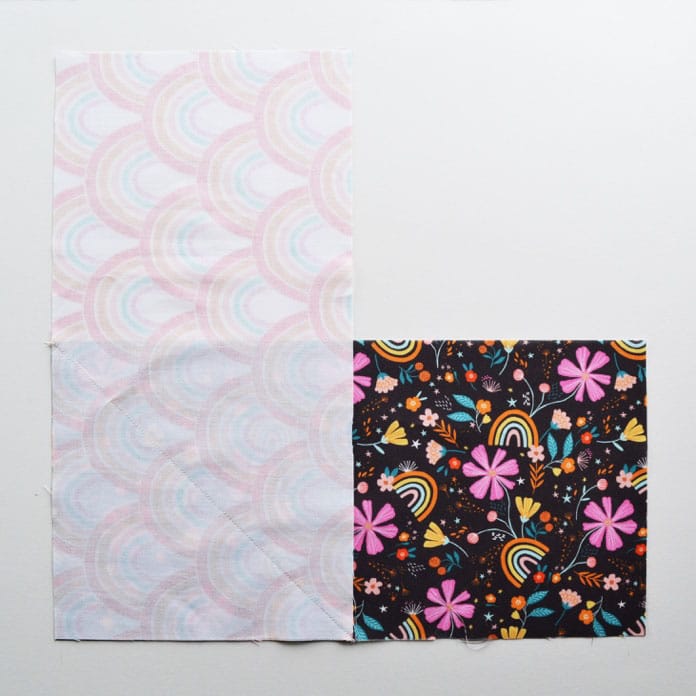
2.
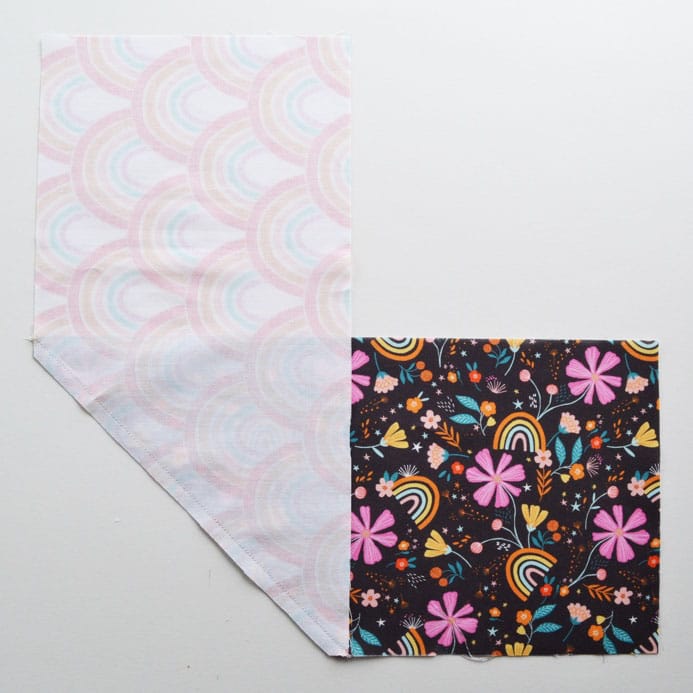
Choose which size planter you want to make first and start by laying out the darker rectangle of fabric for that planter in landscape position, face-up.
Lay the brighter rectangle on top, face-down, at a 90 degree angle to the first rectangle, so that it lines up with the left hand bottom corner of the first rectangle.
Make sure that the long edge of the brighter rectangle that you want to end up at the top (depending on the direction of its pattern) is towards the left.
3.
On the rectangle that’s on top, mark a line at 45 degrees from where the top left corner of the lower rectangle is (you may have to peek under your top rectangle to find this) to the bottom right corner of the top rectangle (i.e., from top left to bottom right of the square where they overlap).
Pin and then sew along that line.
4.
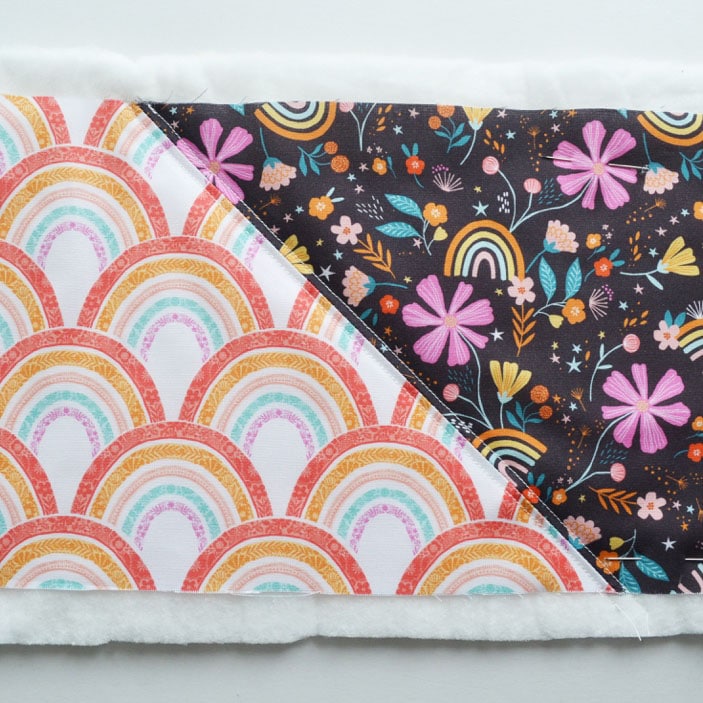
Leaving a 1cm seam allowance, trim away the corner below the line you sewed.
5.
Unfold your panel, so both fabrics are face-up and give it a good press.
6.
Next, lay out your panel, face-up, on top of your wadding and pin in place.
Cut around your panel, leaving at least an extra 1cm of wadding around the edges.
If you have a quilting foot you can attach it your machine, but don’t worry if you don’t, the extra wadding will mean any slight shifting of layers won’t matter.
Sew along one side of the diagonal seam, about 4-5mm from the seam. Repeat to the other side of the seam.
7.
Now you can trim your wadding to match your fabric panel (and change your foot back if you were using a quilting foot).
8.
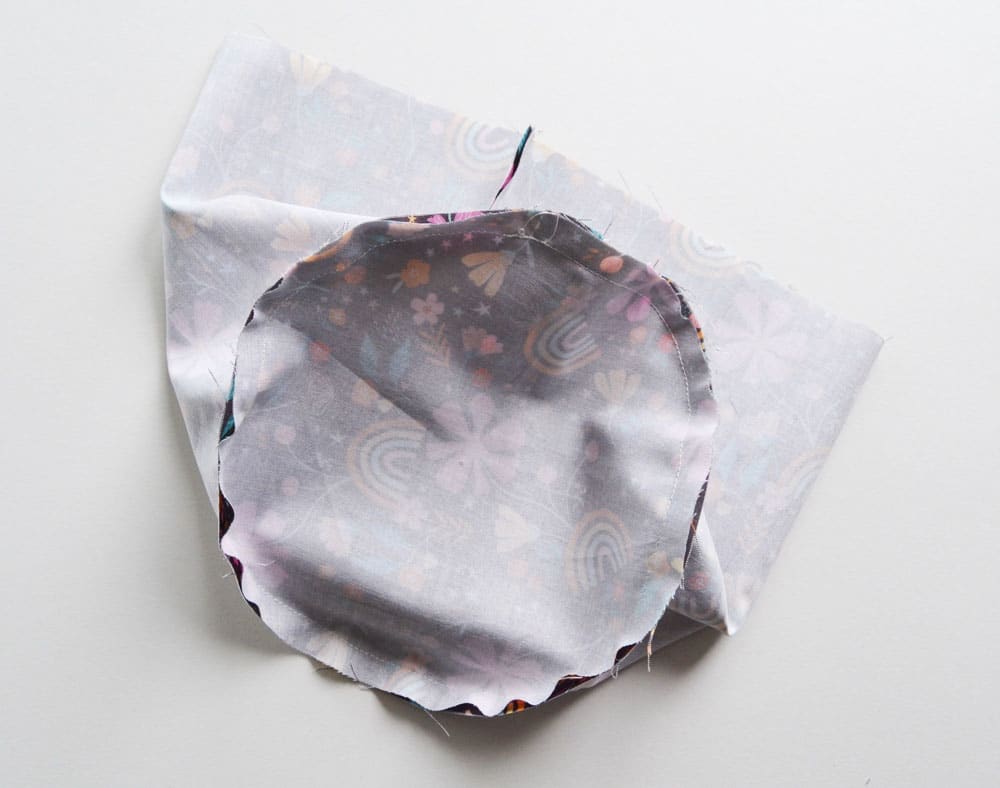
Use your outer panel as a template to cut out a rectangle the exact same size from your darker fabric, for the lining.
Also cut out a circle of each of your fabrics (one bright, one dark), 20cm diameter for the large planter or 17cm diameter for the small planter.
A circle rotary cutter is handy here but if you don’t have one you can simply draw out your circles on paper and use as templates.
Lastly, cut out one circle of wadding to match your fabric circles. Set these pieces aside for now.
9.
Fold your fabric/wadding rectangle in half, right sides in, so that the narrower edges meet.
Pin along that narrow edge and sew with a 1cm seam allowance.
Do the same with the rectangle of darker fabric you cut for the lining.
10.
Lay the brighter fabric circle face-up on top of the wadding circle and pin.
Now take your outer panel, which is now like a loop, and pin your circle in place inside one end of the loop to form the base.
Make sure the fabric side of the circle is facing in and that the ‘tube’ is the right way up, so that the circle will be at the bottom.
Once your circle is pinned in place, sew all the way around with a 1cm seam allowance. Repeat this step with the lining loop and circle.
11.
Turn your outer right way out but leave the lining as is.
Press the top edge of the outer in by 1cm all the way around, and the top edge of the lining out by 1cm all the way around.
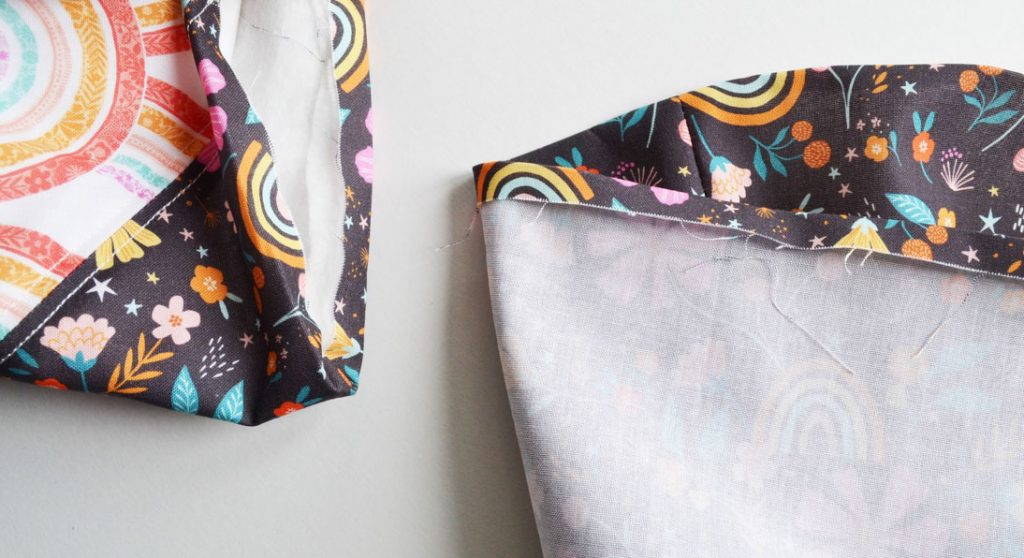
12.
Tuck the lining down into the outer, lining up the side seam. Line up the folded top edges and pin together. Finally, sew all the way around that top edge 3-4mm in.

13.
Repeat all the steps for your second planter!
14.
Fill with your favourite plants or stationery or knitting supplies… You can also fold down the top edges to change their height, so they’re super flexible!