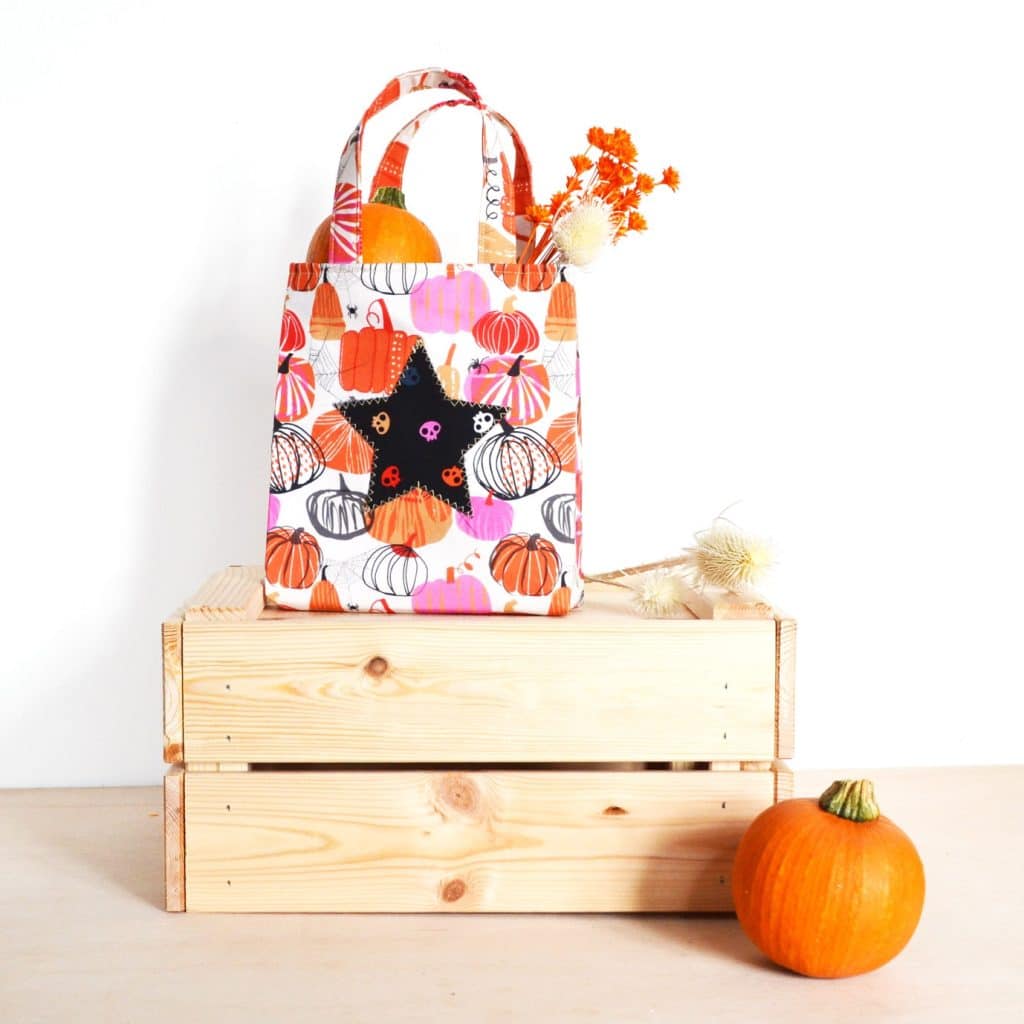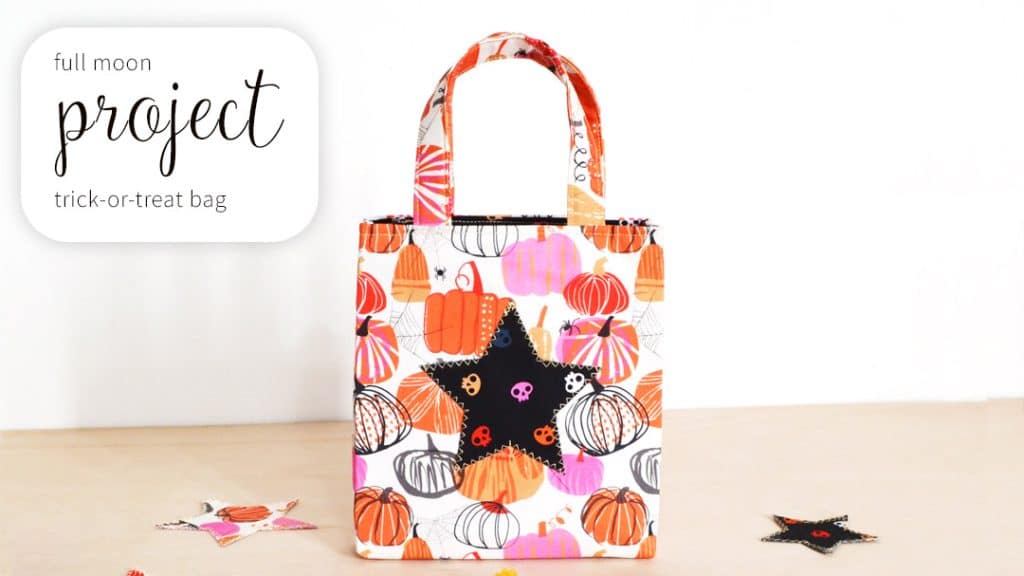
Trick or Treat Bag
Sewing Project by Anna Alicia
Learn how to sew the perfect little fabric bag for trick-or-treating or Halloween party favours!
The Full Moon fabric collection provides the ideal mix of spooky and fun for this project!
What you’ll need
- 50cm (h) x 50cm (w) quilting weight cotton in Pumpkins
- 40cm (h) x 50cm (w) quilting weight cotton in Skulls Black
- 40cm (h) x 50cm (w) stiff, non-iron interfacing
- Scrap of single sided iron-on lightweight interfacing (at least 10cm x 10cm)
- (Optional – extra fabric and medium-weight, double sided iron-on interfacing
to make extra star decorations!) - Star template provided
- Standard sewing kit

Let’s get started!
1.
Let’s start by cutting out the pieces that we need.
Pumpkin fabric:
- two pieces each 23cm x 23cm
- two pieces each 8cm (h) x 30cm (w
Skulls fabric:
- two pieces each 23cm x 23cm
Interfacing:
- two pieces each 23cm x 23cm
- two pieces 3.5cm x 30cm
2.
Lay out your small scrap of lightweight iron-on interfacing (shiny/glue side facing up), place a slightly larger piece of your remaining skulls fabric on top, face-up, and press to fuse.
Once cooled, turn over and draw out your star template on the reverse.
Cut out your star.
3.
Next, lay out one of your stiff interfacing squares and lay one of your pumpkin squares on top, face-up.
Lay your little star on top, face-up, so that it is 5cm down from the top edge and equidistance from the left and right edges.
Pin in place.
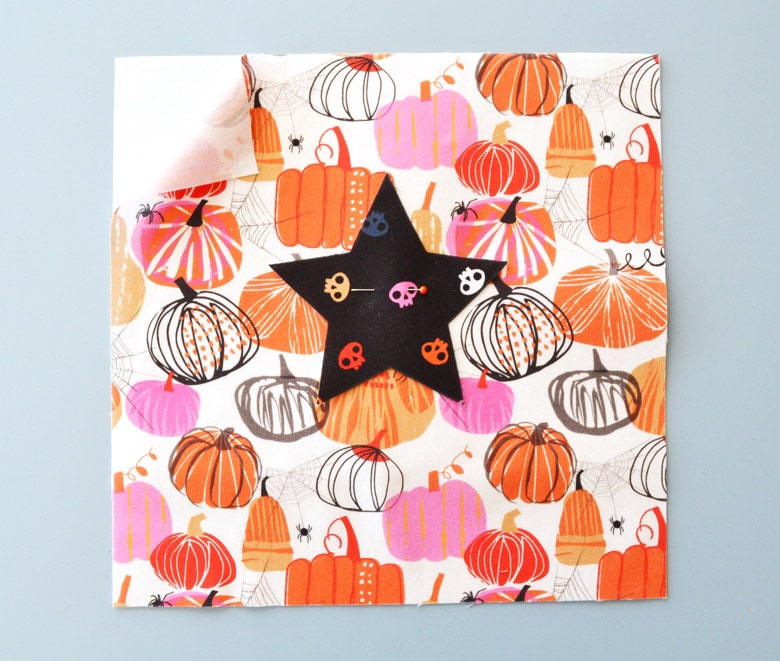
4.
With a zigzag stitch, sew your star in place.

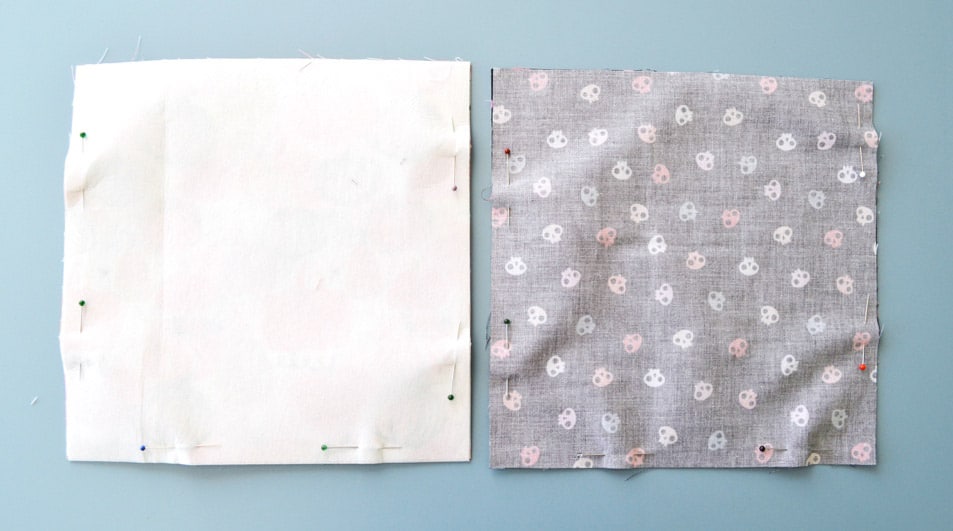
5.
Lay out the panel you’ve just made, with the star towards the top edge.
Lay your other pumpkin square on top, face-down, followed by your other stiff interfacing square.
Also lay out one of your skulls squares, face-up, and lay the second skulls square on top face-down.
For both of the piles you just made, pin along the side and bottom edges, leaving the top edge open.
6.
Sew along the edges you pinned, with a 1cm seam allowance, and leaving
the top edges open.
7.
To give the bag its shape, we now need to square off the corners of the lining (skulls) and outer (pumpkin) pieces.
Flatten a bottom corner of your lining so that the side seam runs directly above the bottom seam and you form a point.
Measure 2cm up from the point formed by the seams and mark a line at a 90 degree angle across the side seam.
Pin and then sew along that line. Trim away the excess corner.
Repeat this for the other bottom corner of the lining and for both corners of the outer.
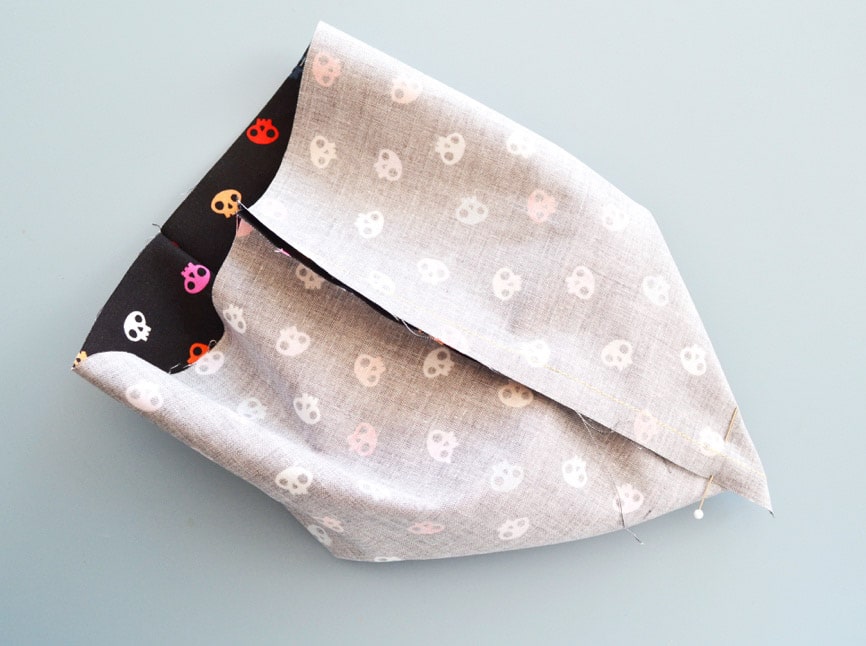
8.
Now turn your outer piece right way out. Tuck your lining piece down inside your outer piece, lining up the seams.
Fold in the edges by 2cm each, like a paper bag (see below), and press well.

9.
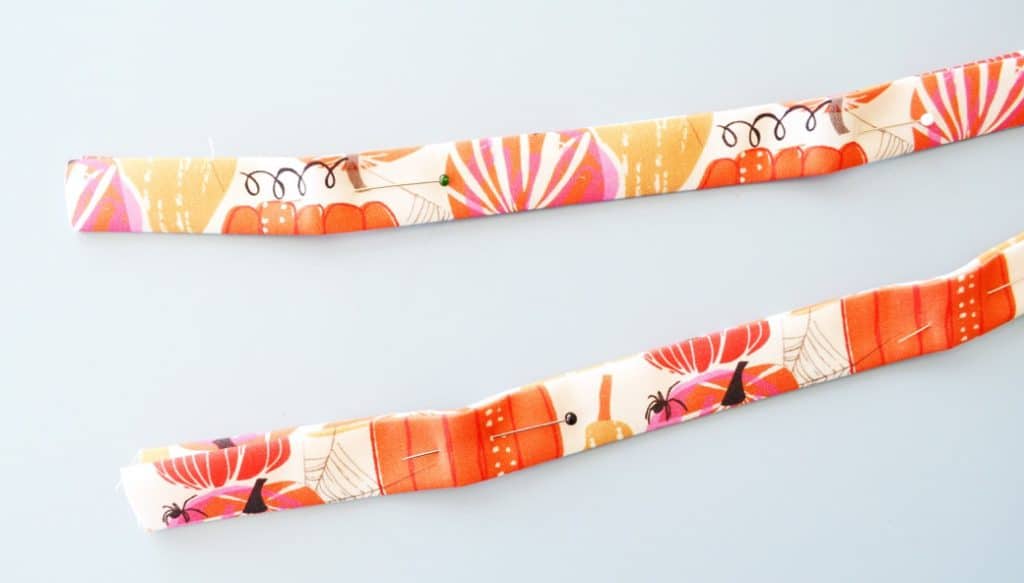
We just need to make the handles now!
Take your strips of pumpkin fabric and fold each in half, so the long edges meet, pressing to crease.
Unfold and now fold the long edges to meet along the centre crease.
Unfold and add a strip of stiff interfacing along the centre of each fabric strip.

10.
Fold the edges in again and fold again along the first, centre crease.
Pin along the length of each strip.
Sew along both long edges of each strip, roughly 2mm in.
11.
Take your bag and fold over (right-sides out) the top edge of the lining and the outer by 1cm each, pressing to crease.
Now, position one of the strips you just made so that 2cm at each end is tucked between the lining and the outer to form a handle.
Make sure the ends are both the same distance from their closest edge.
Pin in place and repeat with the other strip on the other side of the bag.
Check your handles are not twisted.
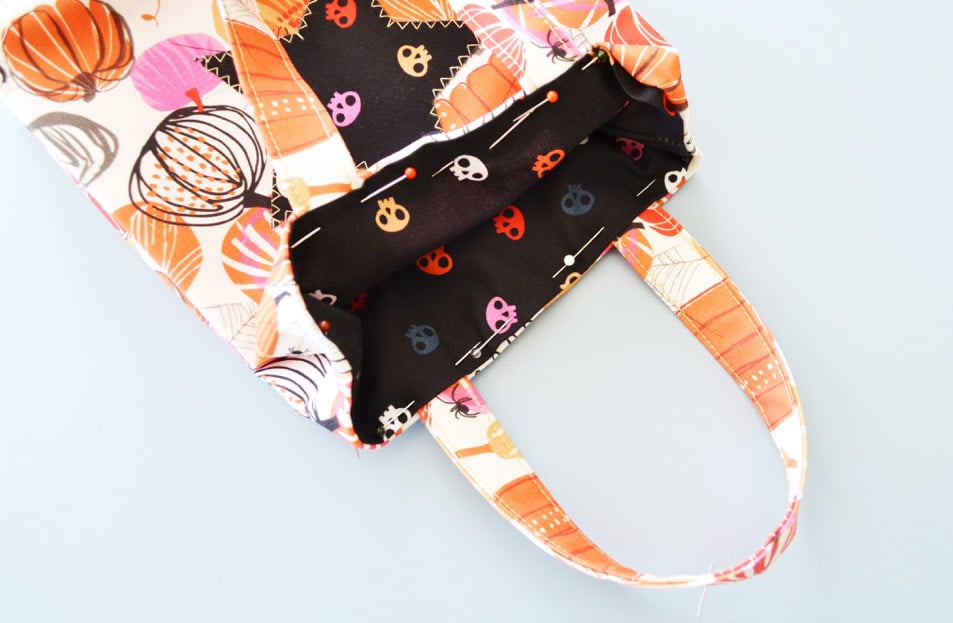
12.
Finally, sew all the way around your top edge 3-4mm in, securing your handles in place.
Enjoy your new trick-or-treat bag!
Bonus Project!
As a little extra, why not make some simple fabric star decorations!
Simply lay out some fabric face-down, lay some double sided interfacing on top, followed by another layer of fabric, face-up.
Press to fuse (following the instructions
for your particular interfacing).
Now draw (using our template, or you can make your own in more sizes) as many stars as you want.
Cut them out and zigzag stitch around the edges to finish!
Use as they are for table confetti or stitch them to a length of ribbon or string to form a Halloween garland!
Happy Halloween!!