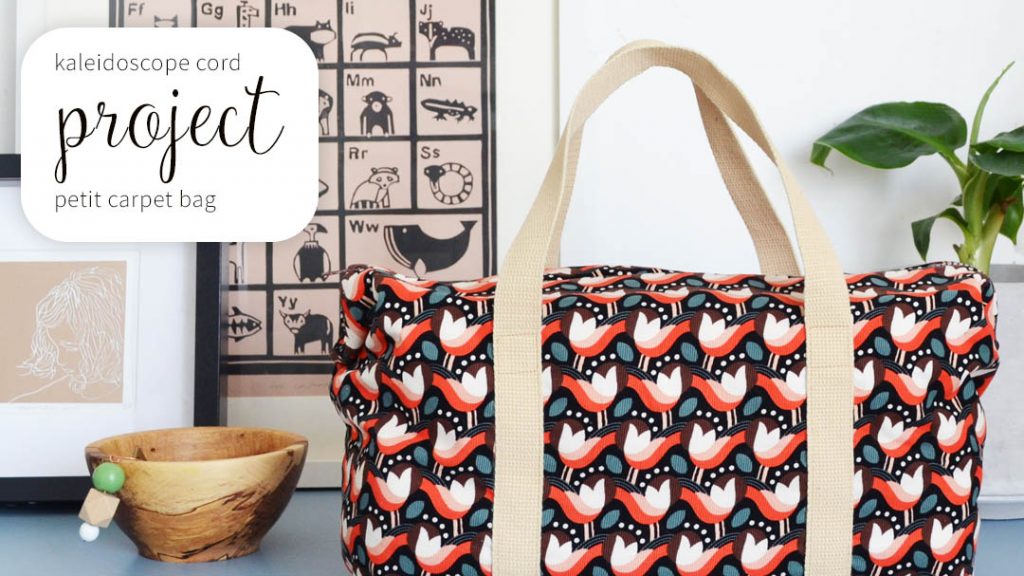
Learn to sew a Corduroy Carpet Bag
Sewing Project by Anna Alicia
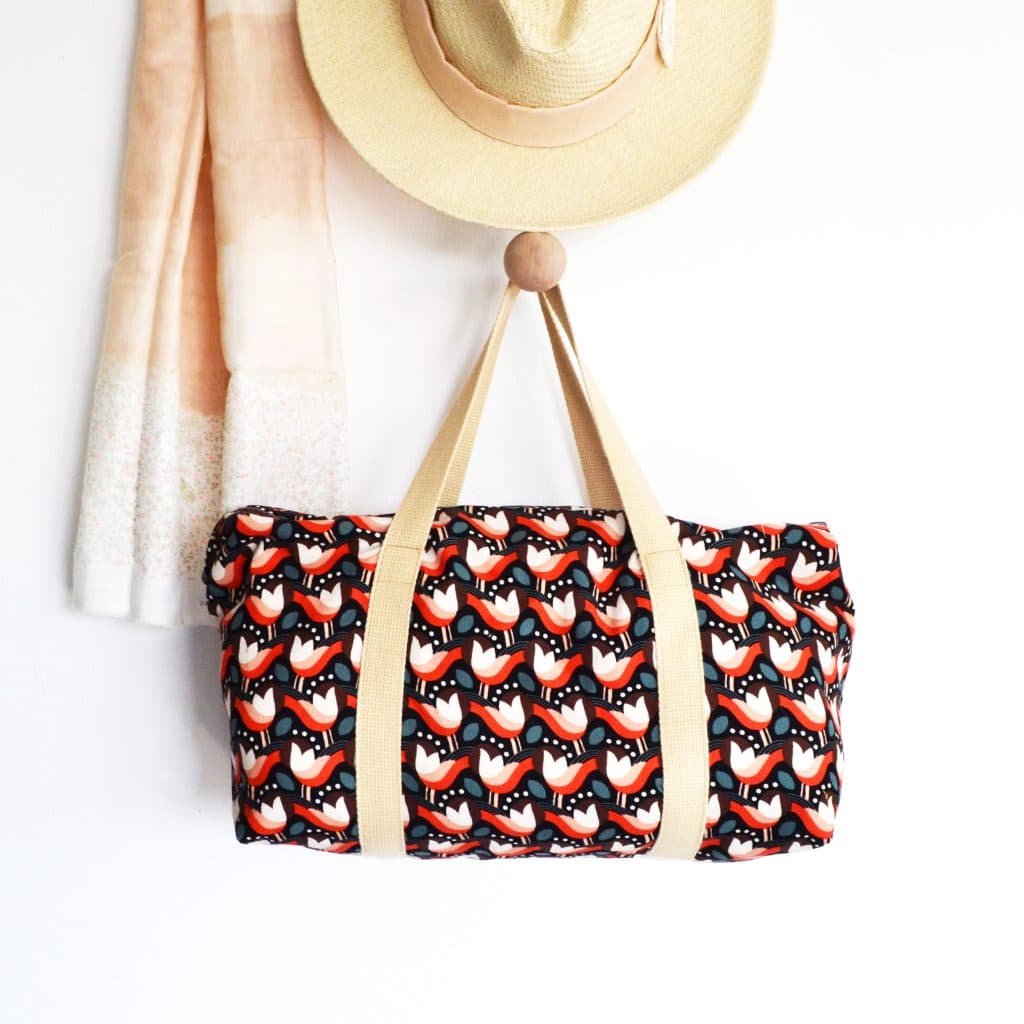
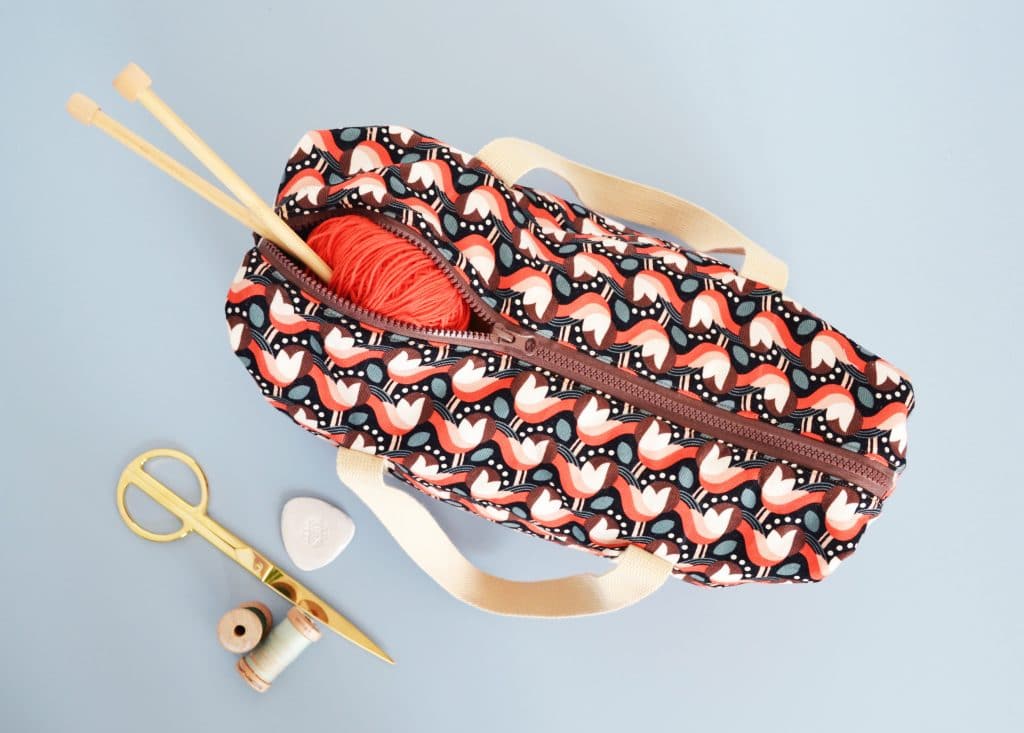
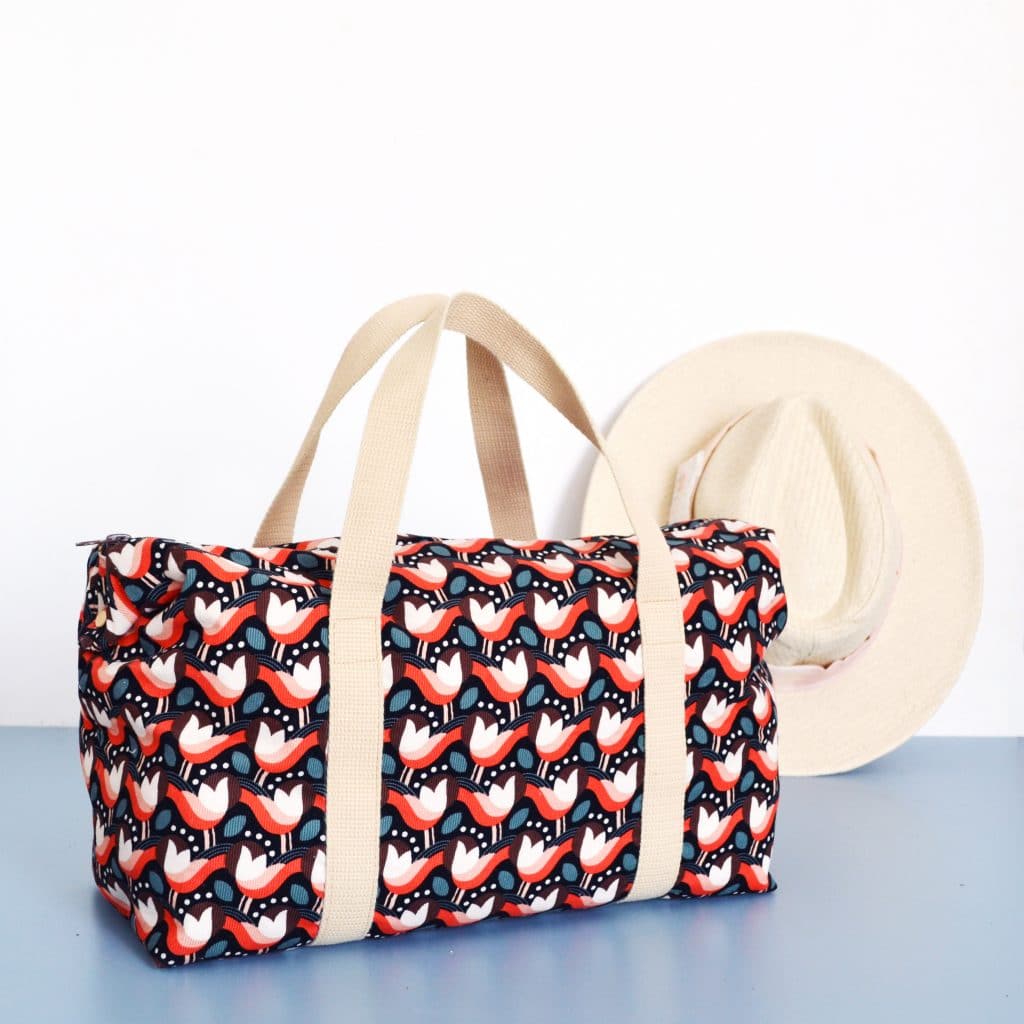
Discover the versatility of our charming corduroy carpet bag. Whether you need a stylish lunch and suncream carrier for your park outings or reliable storage for your sewing/knitting projects, this adorable little boxy bag is perfect. Crafted from Dashwood Studio kaleidoscope cord fabric, featuring a delightful retro floral pattern, this bag offers an ideal weight and texture for bag making!
Finished bag approximately 25cm (h) x 40cm (w) x 15cm (d)
What you’ll need
40cm (h) x 110cm (w) outer fabric (I’ve used Dashwood Studio Kaleidoscope Corduroy in Retro Tulip)
40cm (h) x 110cm (w) lining fabric (I’ve used Dashwood Studio Kaleidoscope Corduroy in Dainty Floral and Fruits)
40cm (h) x 110cm (w) light-weight wadding – 2m of webbing, 2.5cm wide (I’ve used a natural shade, but you could pick out any colour from your outer fabric!)
40cm chunky closed end zip (I’ve chosen brown, but as with the webbing you could pick out a different colour) – Thread to match your fabrics and your webbing
OPTIONAL: two Chicago screws with 6mm shafts, a bradawl (or similar sharp tool) and flat-head screwdriver
Let’s get started!
1.
First, we need to cut out our fabric.
Outer fabric: 2 rectangles, each 35cm (h) x 52cm (w) 2 rectangles, each 14cm (h) x 3cm (or the width of your zip if wider)
Lining fabric: 2 rectangles, each 35cm (h) x 52cm (w)
Wadding: 2 rectangles, each 35cm (h) x 52cm (w)
2.
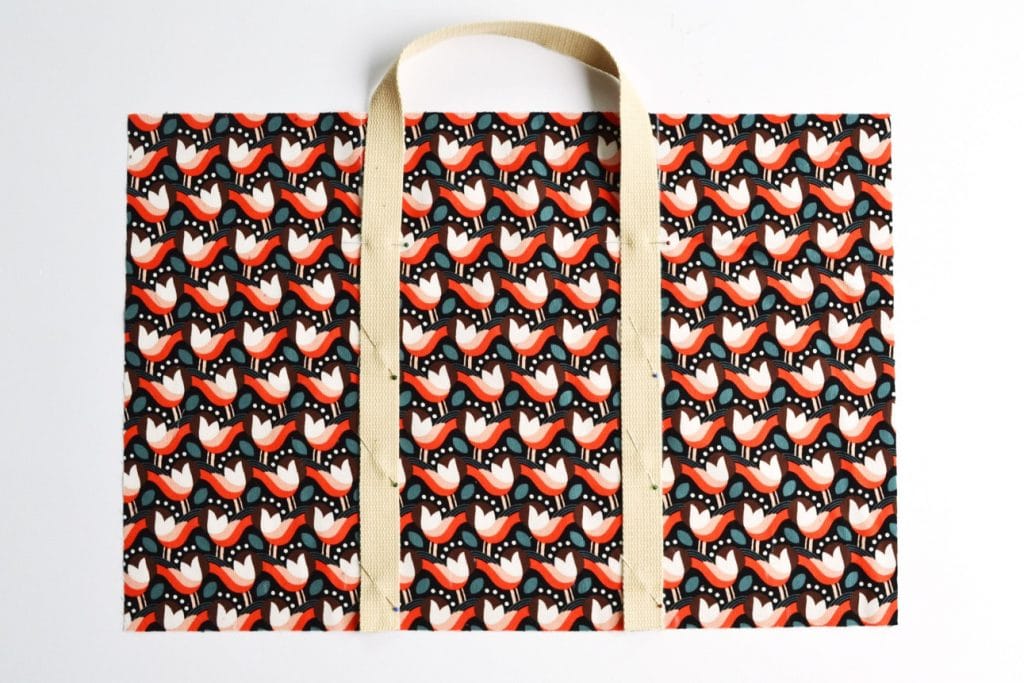
Next, we’ll add the handles to the outer panels. Lay out your two outer panels landscape position. Measure and draw a line in tailor’s chalk 16cm in from the right-hand edge of each panel. Do the same from the left-hand edge.
Cut two 95cm long strips of your webbing. Take one of your webbing strips and starting from the bottom edge of one of your outer panels, pin the webbing in place so it lines up with the inside edge of the chalk line you drew on the right of your panel.
Now take the other end of the same strip of webbing and pin in the same way, on the inside of the line you drew to the left. This should form a webbing handle at the top of your panel – make sure the handle isn’t twisted!
Repeat for your other panel with the second strip of webbing.
3.
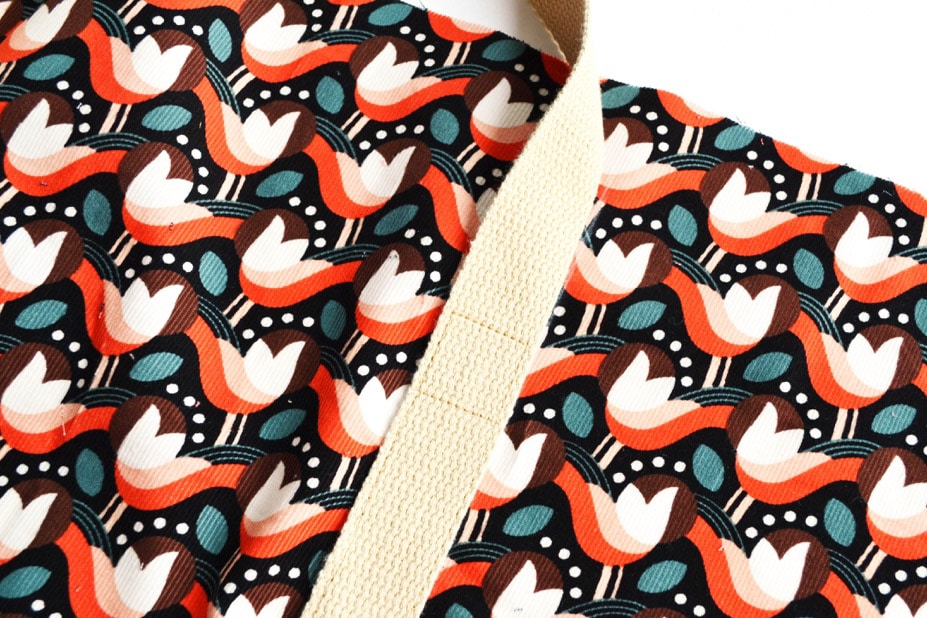
On each pinned length of webbing, measure and mark a point 9cm down from the top edge of your panel.
Starting at the bottom of one of your pinned lengths of webbing, sew along one edge of the webbing, about 2-3mm in. At the point you marked (9cm from the top edge) stop and turn your panel 90 degrees so you can sew across the webbing, stopping 2-3mm from its other edge, turn 90 degrees again and sew about 2.5cm along that edge, turn again and sew back across (forming a square!), turn again and sew back to the 9cm mark, across and down again, but this time continue to the bottom of the strip. Repeat this for the other 3 pinned sections of webbing.
4.
Fold the handles at the top of your panels down, and pin them to keep them out of the way of that top edge.
5.
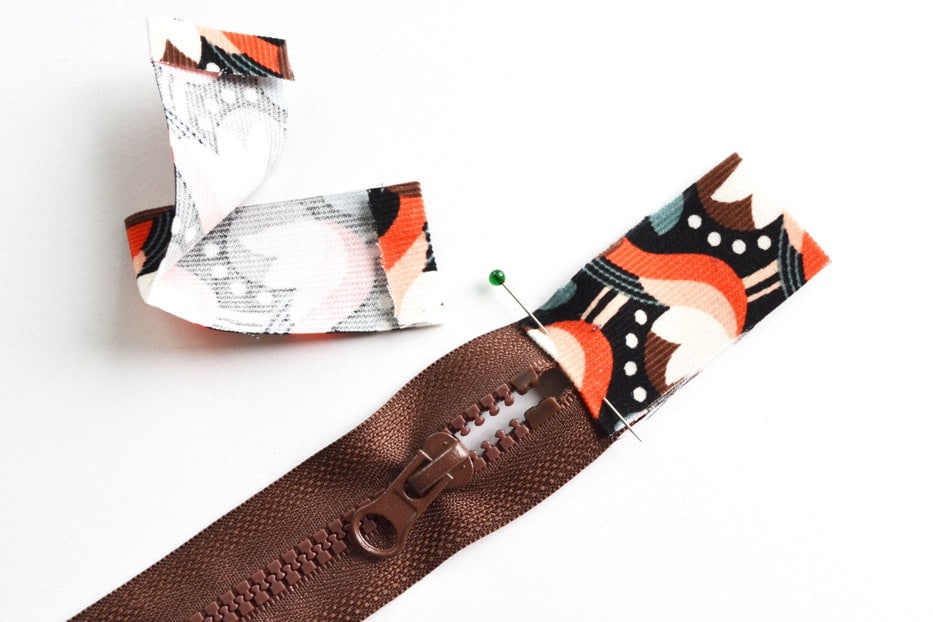
Now we can prepare the zip by adding the zip tabs at the ends! Take the two small rectangles of outer fabric you cut earlier and fold both narrow ends of each over by 1cm (right side out), pressing with an iron to crease. Next, fold the strips in half (right side out) so that the narrow, folded edges meet, pressing again to crease.
6.
Take your zip and place one end of it inside one of the folded zip tabs you just made, so the zip tab sits just below the zip stop. Pin the tab in place and repeat at the other end of your zip with the other tab. Sew across your zip tabs 2-3mm in. Using your zipper foot can be helpful here so the zip stops don’t get in the way.
7.
Now your zip is prepared, we can start assembling the bag. Lay out one of your lining panels, face-up, landscape position. Lay your zip on top, face-up, so it lines up with the top long edge. Lay one of your outer panels on top, face-down (making sure the handle will be at the top edge) and, finally, lay one of your wadding panels on top! Pin or clip (fabric clips can be easier when you have lots of layers!) along that top edge.
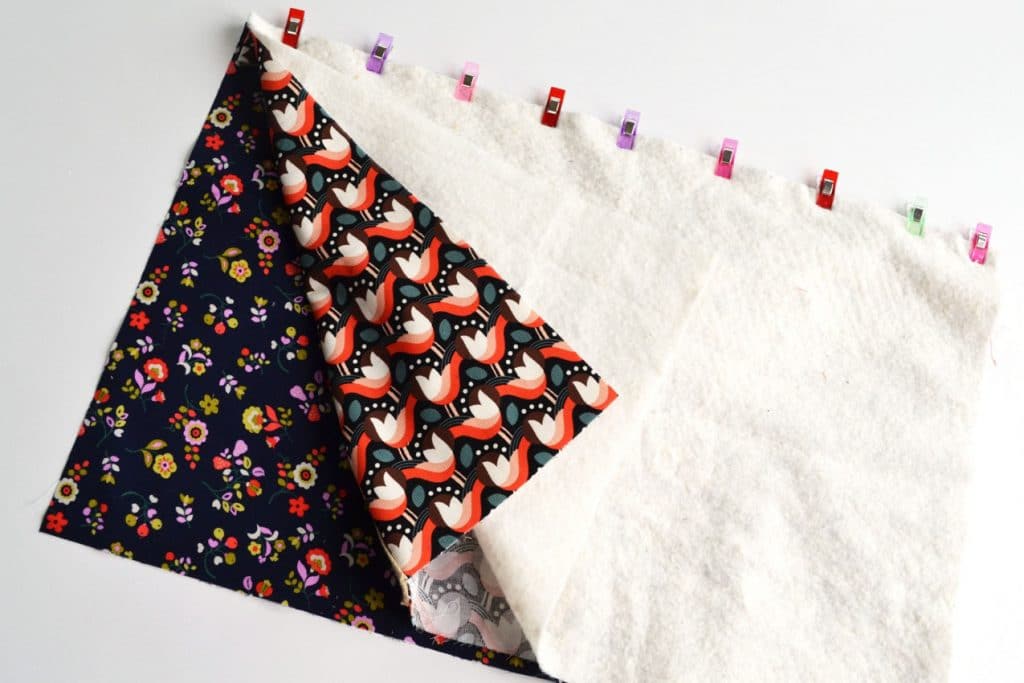
8.
With your zipper foot on your machine, sew along that top edge a few mm from the zip’s teeth.
9.
Unfold your panels so that you can see the zip again. Lay out your other lining piece, face-up, and lay the zip along the top edge, face-up, as before (with the zip’s remaining raw edge lining up with the top edge). Lay your remaining outer on top, face-down, and your other wadding piece on top. Pin/clip and sew as before.
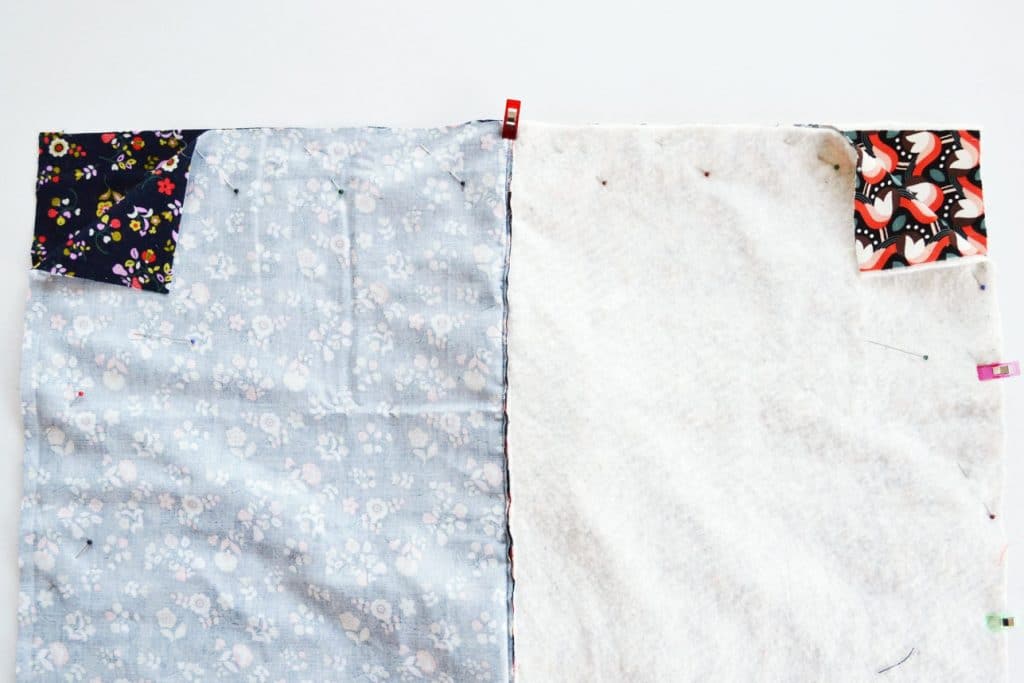
10.
Unfold again, so that you can see your zip and you have a sandwich of lining/wadding/outer on either side of the zip. Carefully press your panels along the edges of your zip (careful not to melt your zip!). Pin the layers of your panels together at each side. About 2-3mm from where it meets the zip tape, sew along each of your panels to hold the fabric neatly away from the zip.

11.
Unzip your zip! (This will be essential when you come to turn your bag right way out later.)
12.
Bring the two lining panels together so that they are face-to-face. Do the same with the outer panels (treating the outer/wadding as if it is one layer). Pin/clip all the way around the edges. Make sure the teeth of your zip are pointing towards the lining side (this just gives neater corners later).
13.
Sew all the way around the edges, with a 1cm seam, but leave a roughly 8cm gap on one of the lining edges.
14.
To create the boxy shape of the bag we’ll need to square off the corners. Flatten out one of your corners so that the side seam runs directly over the bottom seam. Measure 7.5 cm along the seam from where it ends at the tip of the corner. At that point, mark a line across at a right angle to the seam (this line should be roughly 15cm long). Pin and then sew along that line. Trim the corner away about 1cm from the seam. Repeat for the other 3 corners.

15.
Now we can turn the bag right way out through the gap you left in the lining. You can either sew the gap up by hand for a really neat finish or just sew with your machine as it’ll be hidden inside the bag. Once the gap is sewn up, tuck the lining down inside the outer and unpin the handles.
16. (Optional)
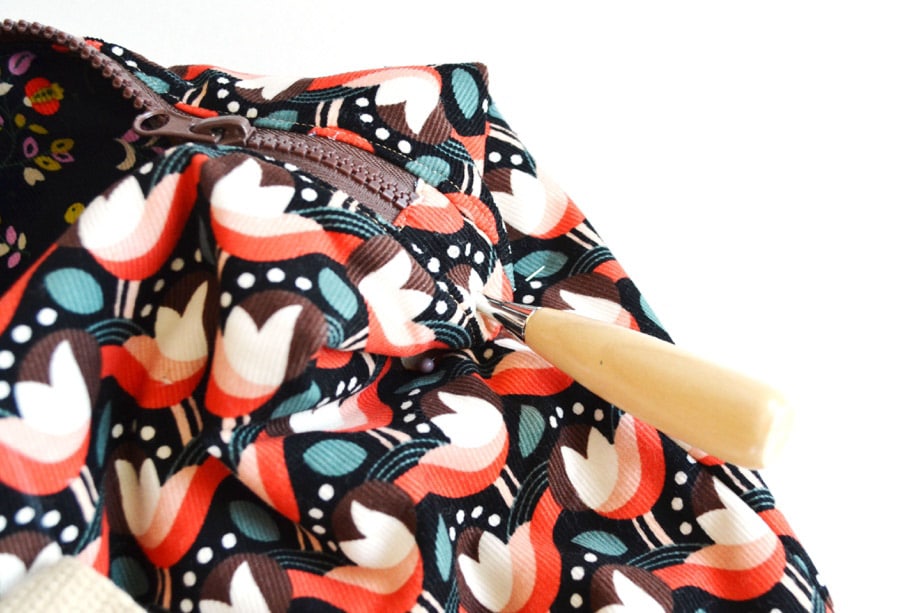
You can leave your bag like this, so it is wider at the top and narrows towards the base, or if you want to create a really boxy shape you can add some Chicago screws to hold down the top corners!
To do this, flatten the corners at the ends of the zip and fold each down by 5cm (lining up the tip of the corner with the side seam of the bag). Pin in place. About 1.5cm up from the tip of one of the folded corners, use your bradawl to pierce a hole all the way through all the layers of fabric (you’ll have to be quite firm with it and you’ll need to make a hole large enough for your Chicago screw to go through). Push the shank of the outer part of your Chicago screw through the hole and add the inner screw part from the inside of your bag. Tighten with a flat-head screwdriver. Repeat for the other top corner of your bag.
17.
ENJOY YOUR NEW BAG!
There’s lots of room to hack this simple pattern and really make it your own – why not add a pocket or two, a long shoulder strap, or you could quilt your fabric and wadding together before making up the bag…